Yarn Tree Ornaments DIY: How To Make These Cute And Easy Christmas Tree DIY Ornaments
I absolutely love Christmas, and one of my favorite holiday activities is decorating the tree. There’s something so special about hanging ornaments that you’ve made yourself. They add a personal touch and make the tree truly unique.
Over the years, I’ve discovered that making DIY ornaments is not only fun but also a great way to use up leftover materials. One of my favorite projects is creating yarn tree ornaments. They are quick to make, require minimal materials, and can be customized in endless ways.
In this post, I’ll guide you through the steps to make beautiful yarn tree ornaments that will add a handmade charm to your Holiday Home decor.
No Time to Read? Watch The Video Tutorial:
Why These Yarn Tree Ornaments Are Great for a DIY
- Quick to Make: You can complete one ornament in about 15 minutes.
- Easy to Make: Perfect for beginners and kids.
- Customizable Colors: Use different colors of yarn to match your holiday decor.
- Add Personal Touches: You can add pearls or other decorations to make them unique.
- Use Leftover Yarn: Great way to use up yarn from other projects.
- Minimal Materials Needed: Most of us already have the necessary items at home.
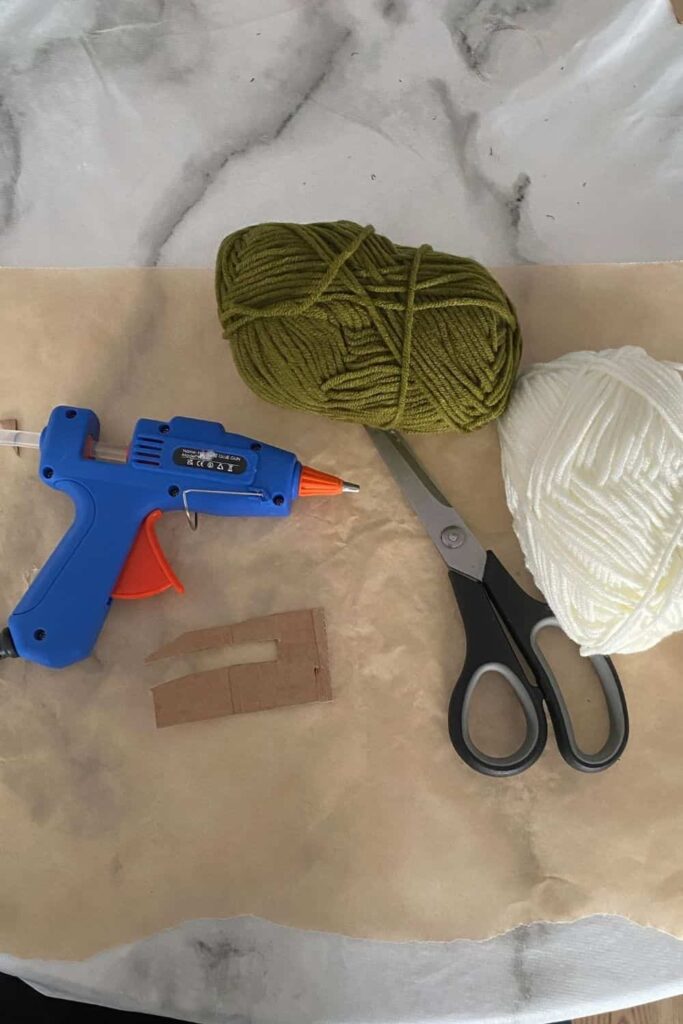
What You Need
- Yarn: Choose two colors for added dimension, though you can use just one color if you prefer. Thin yarn works best.
- Cardboard: Any sturdy piece will do.
- Scissors: For cutting the yarn and cardboard.
- Hot Glue Gun and Glue Sticks: Alternatively, you can use super glue.
What to Do
Step 1: Cut the Cardboard
Cut a rectangular piece of cardboard. The height of the cardboard will determine the size of each part of your tree. It’s better to start with a larger piece and trim it down if needed. For reference, my piece is about 5 cm tall.
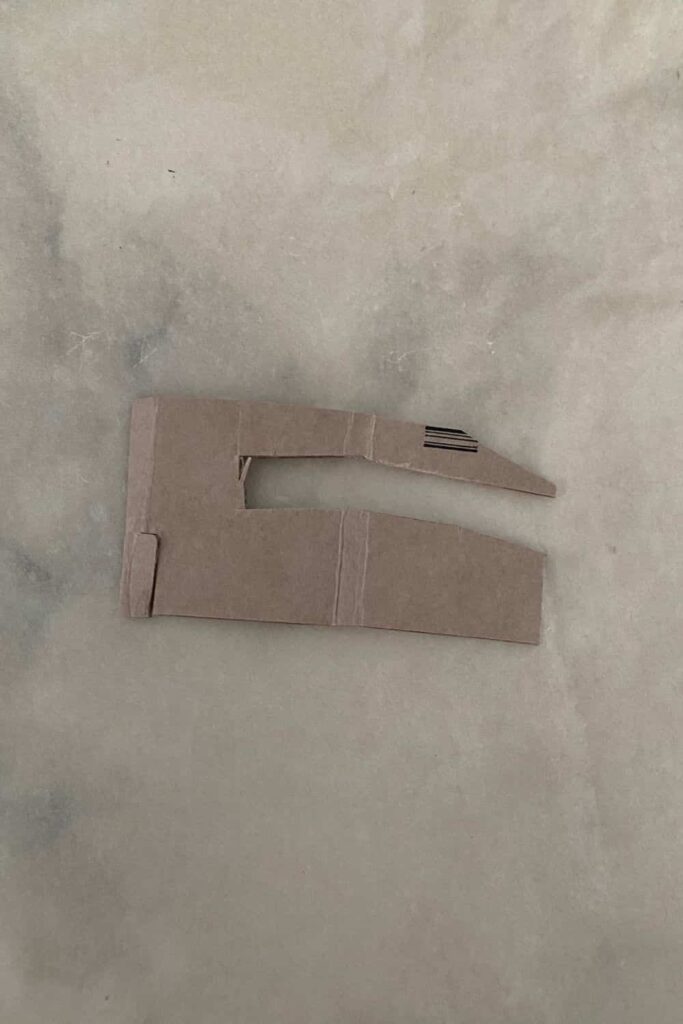
Step 2: Make a Hole
Cut a small hole near the top of the cardboard. This hole will be used to pass the yarn through later on.
Step 3: Wrap the Yarn
Start wrapping the yarn around the cardboard, making sure to wrap around the outer sides and not through the middle. Wrap the yarn around about 15 times. This will form the bulk of your ornament.
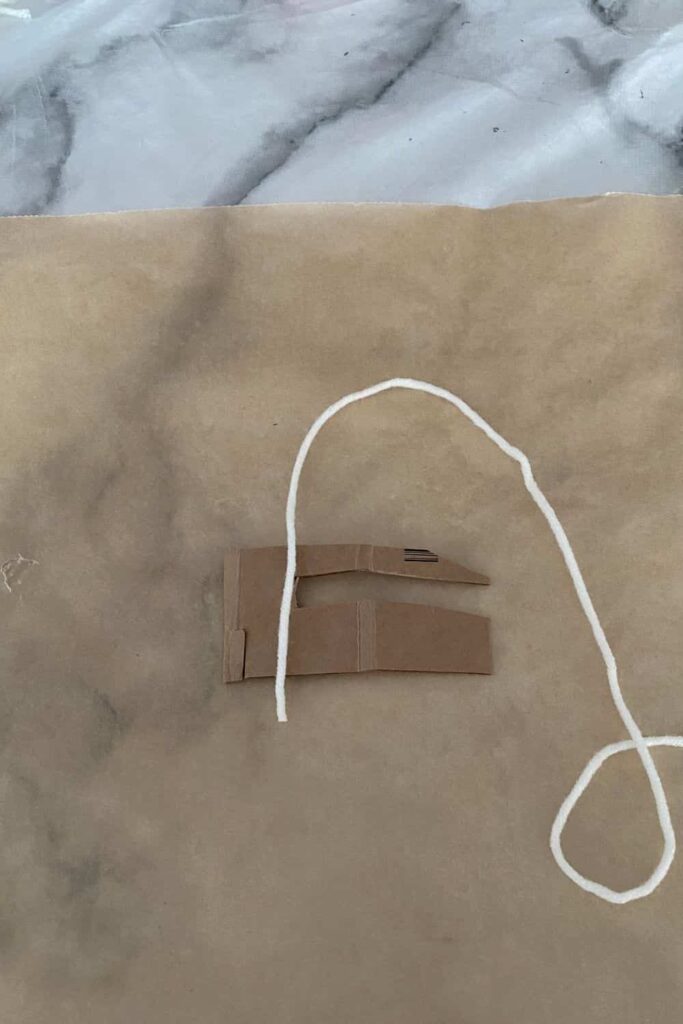
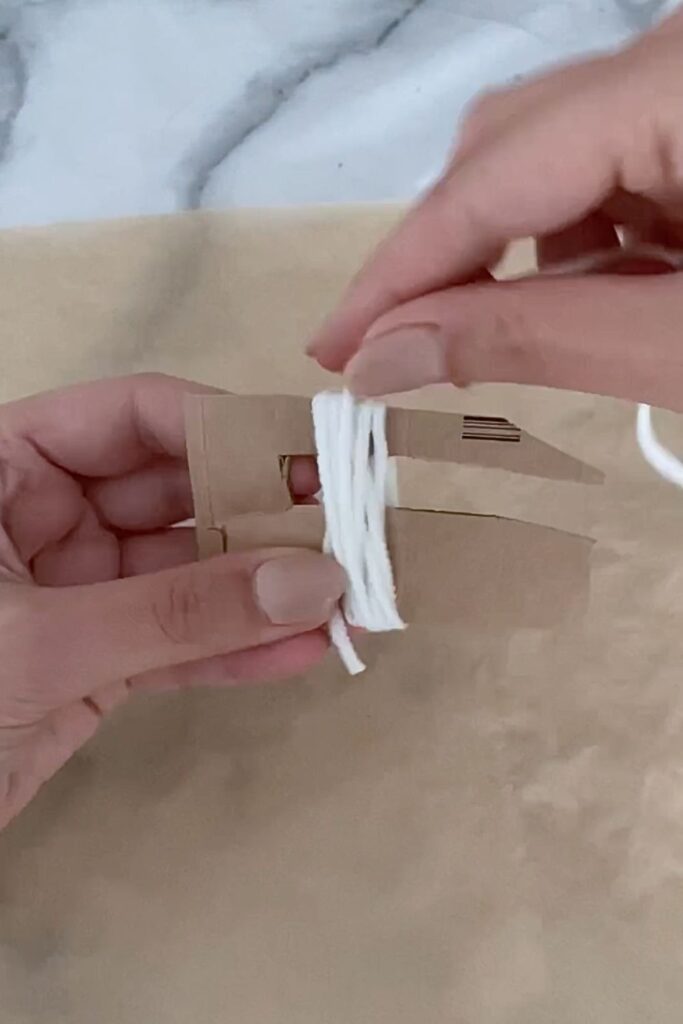
Step 4: Secure the Yarn
After wrapping the yarn 15 times, cut it. Then, take a 10 cm long piece of yarn and wrap it around the wrapped yarn towards the top. Make sure to wrap around the yarn and not through the middle.
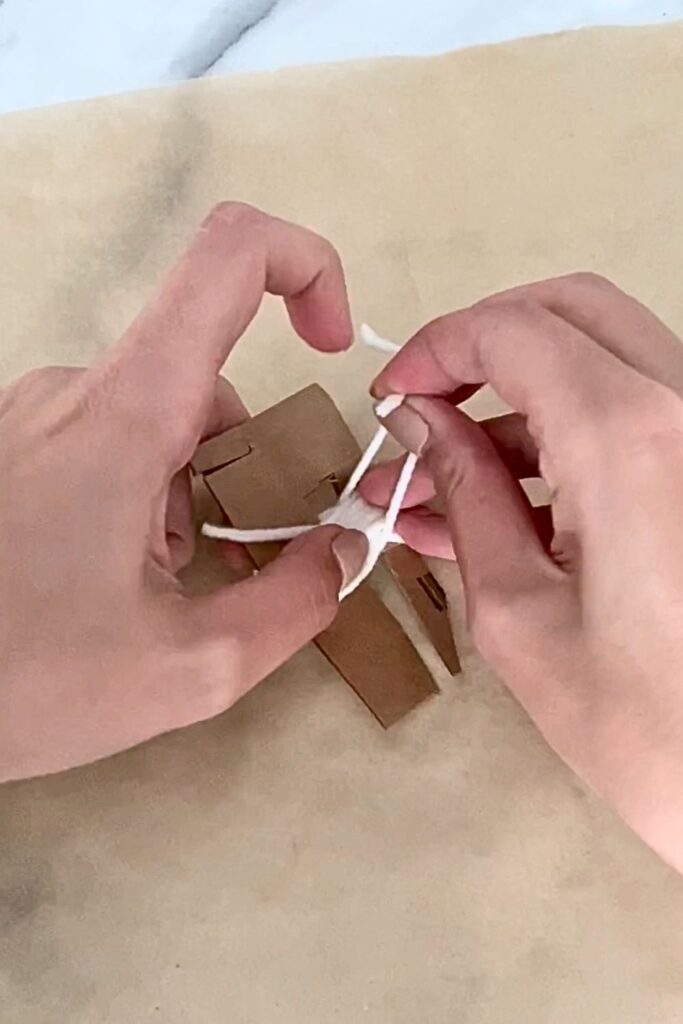
Step 5: Tighten and Knot
Tighten the yarn and tie it with a double knot to secure it in place. Trim any excess yarn sticking out from the knot.
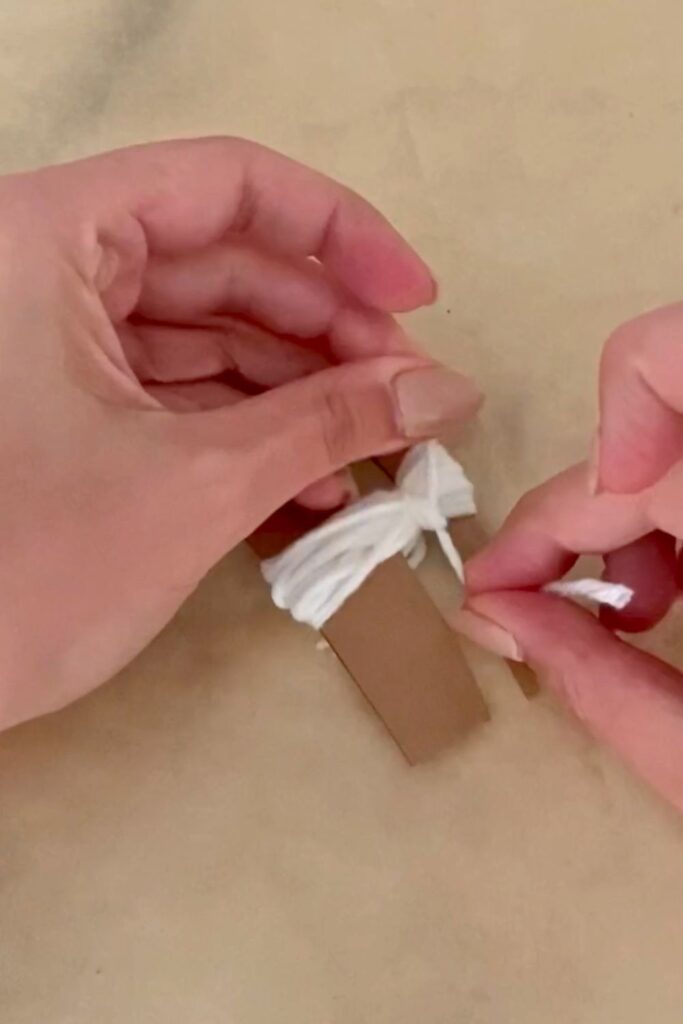
Step 6: Remove from Cardboard
Carefully slide the wrapped yarn off the cardboard. You should have a neat bundle of yarn now.
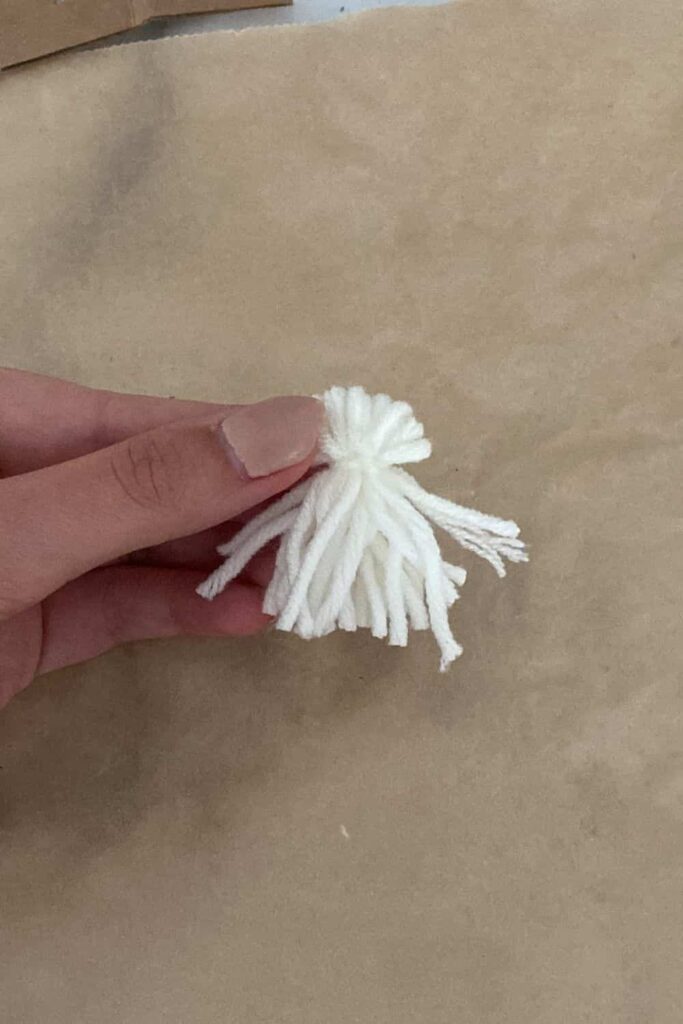
Step 7: Create a Tassel
Take the longer sides of the bundle and pull to cut the ends. This will create your first tassel for the tree ornament.
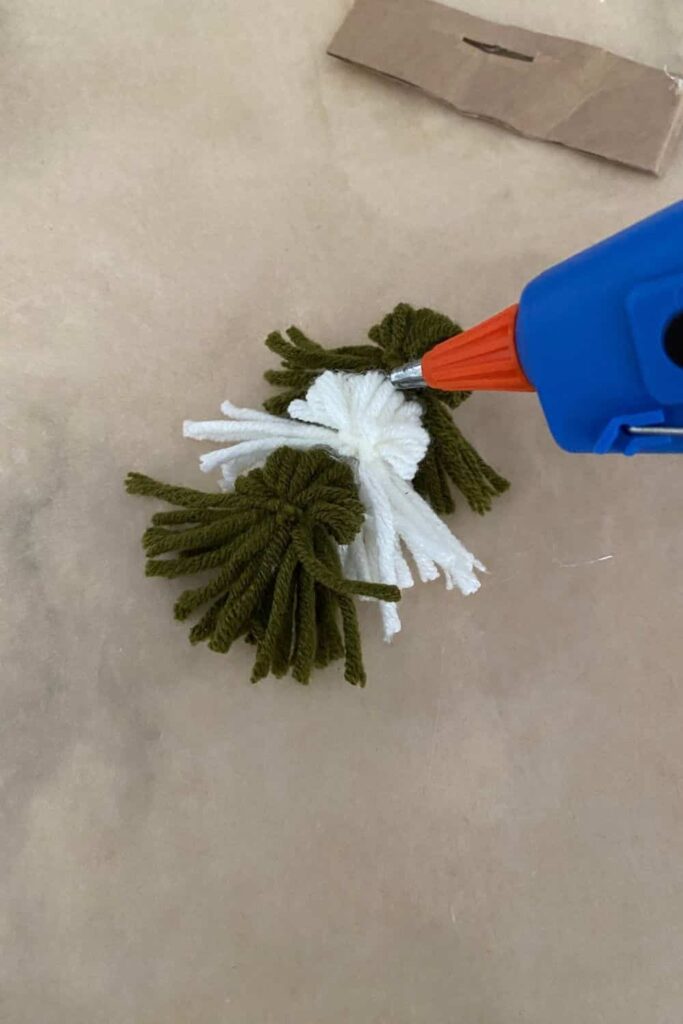
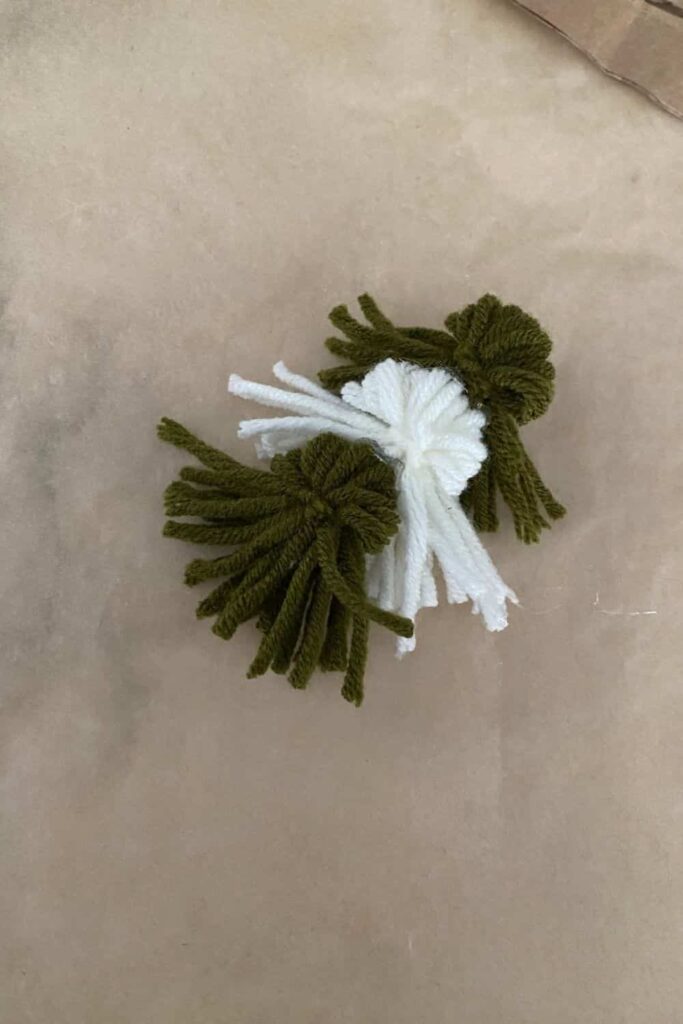
Step 8: Repeat the Process
Repeat the process three times. Make one more tassel with the same color and one with a different color for added dimension.
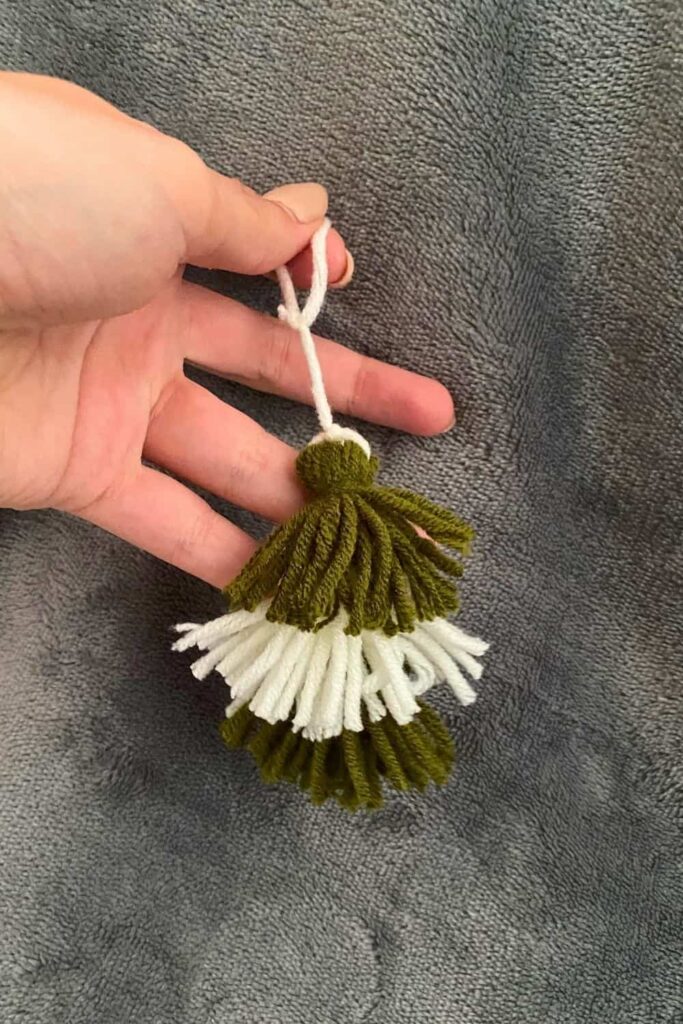
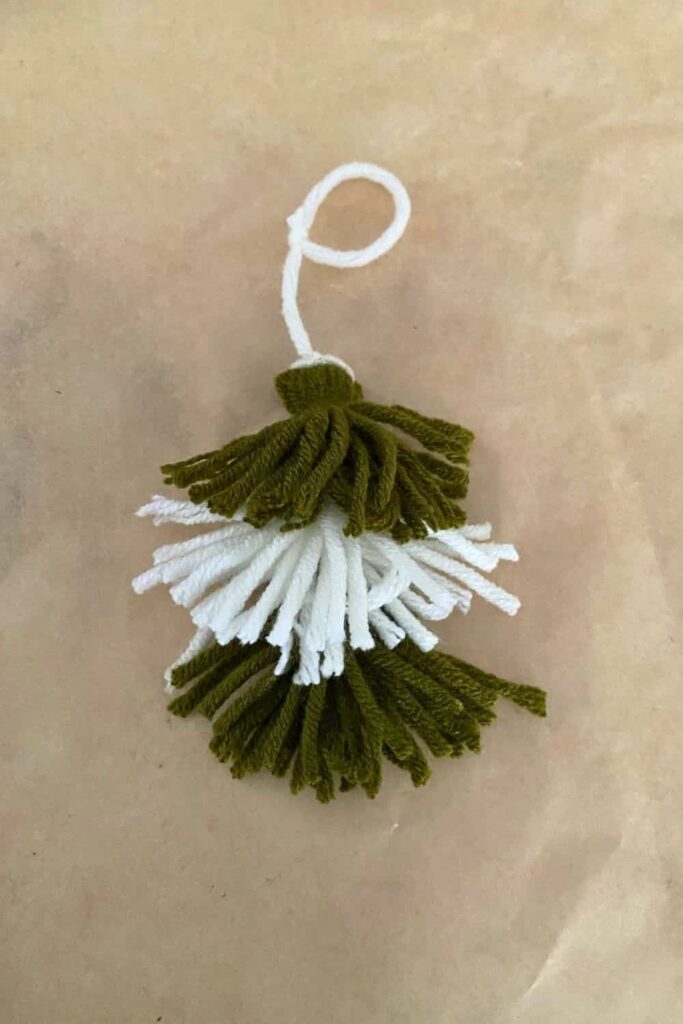
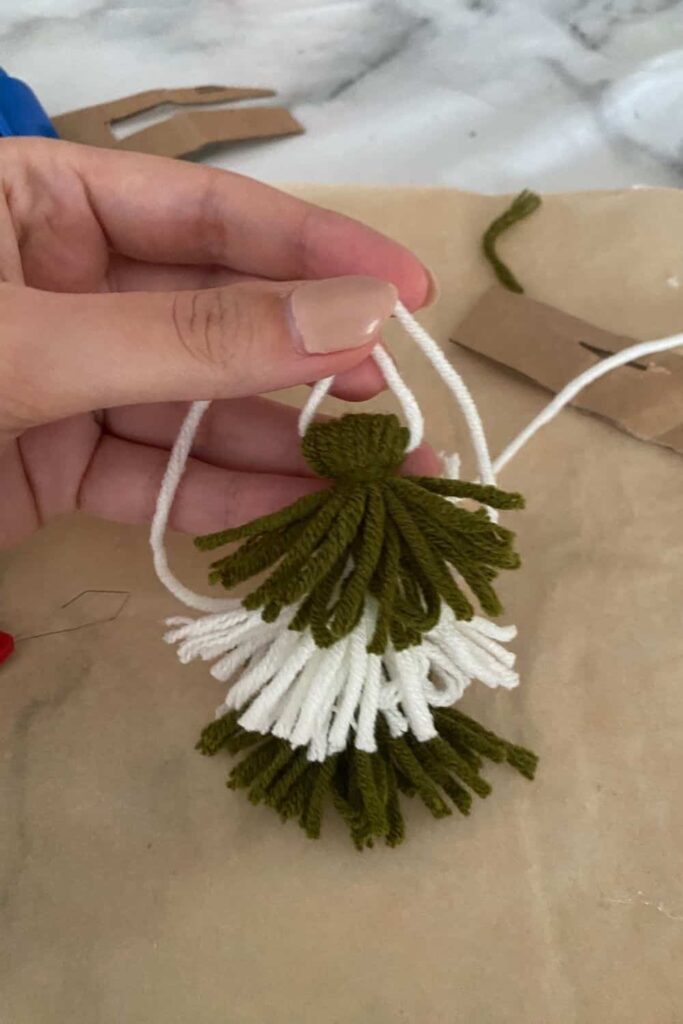
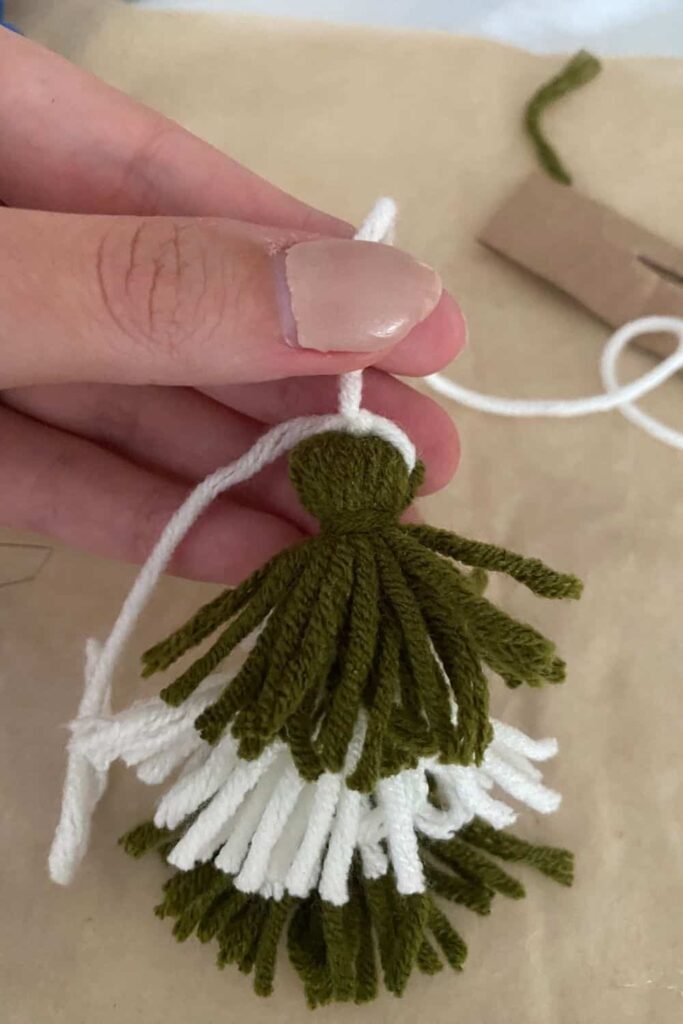
Step 9: Assemble the Tree
Using hot glue, assemble the tassels together. Leave a little bit of space between each tassel to create the different levels of the tree.
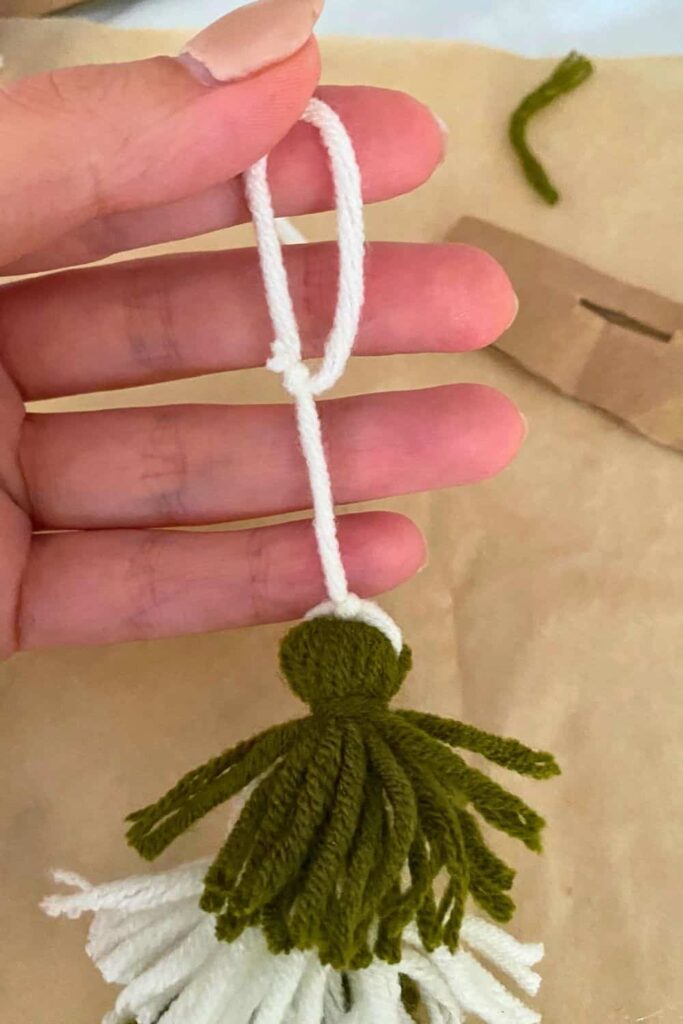
Step 10: Add the Hanging Loop
Take a piece of yarn and pass it through the top hole of your assembled tree. Tie a double knot and trim the ends. This will create the loop for hanging your ornament on the tree.


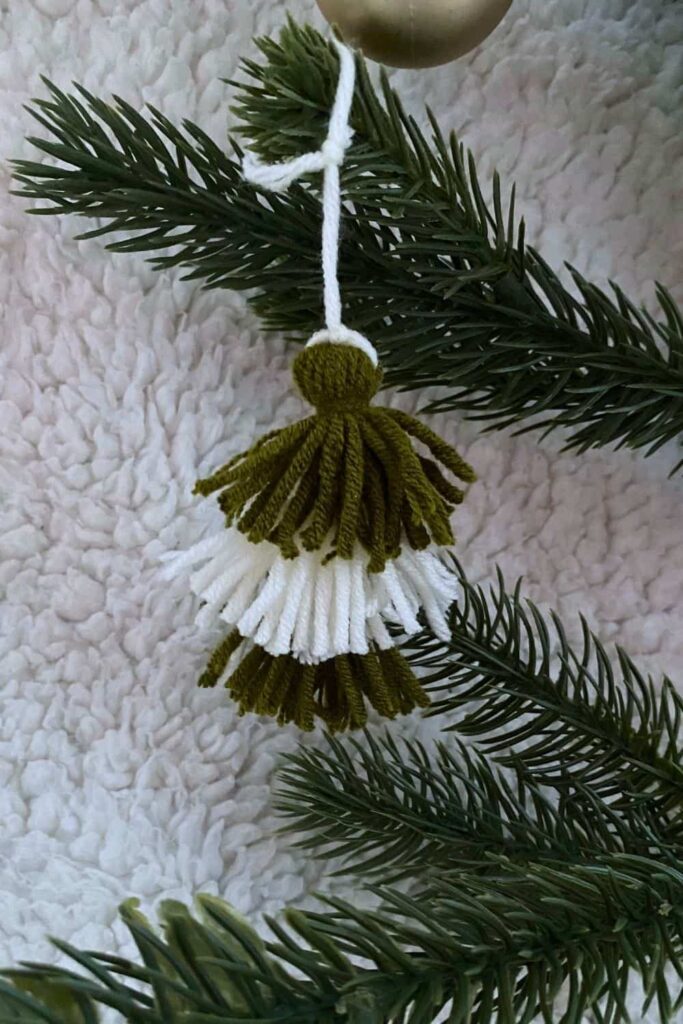
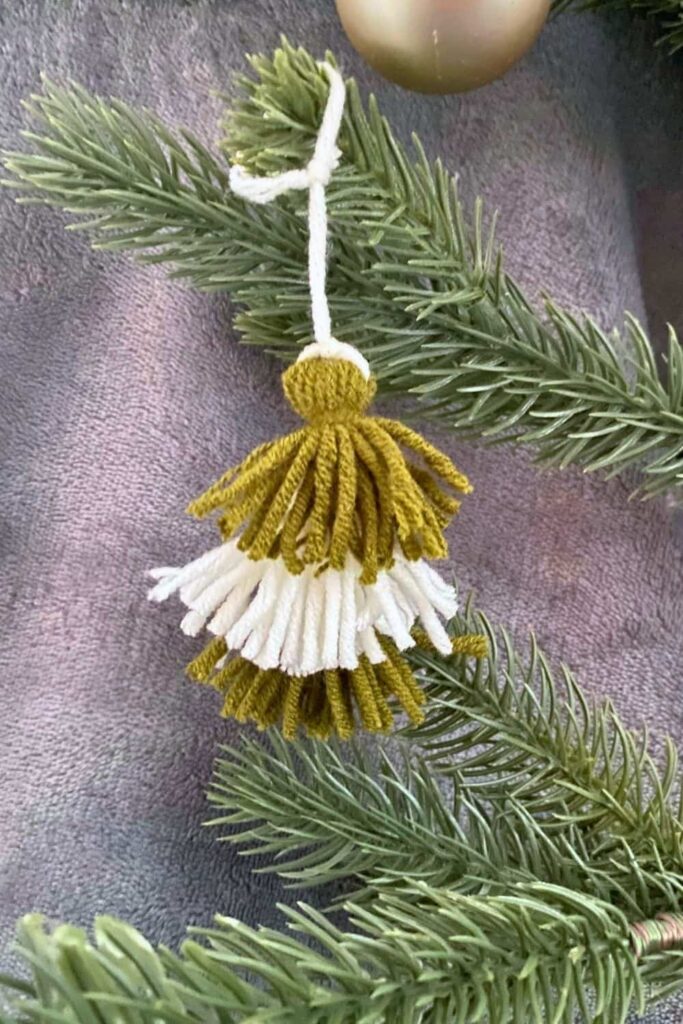
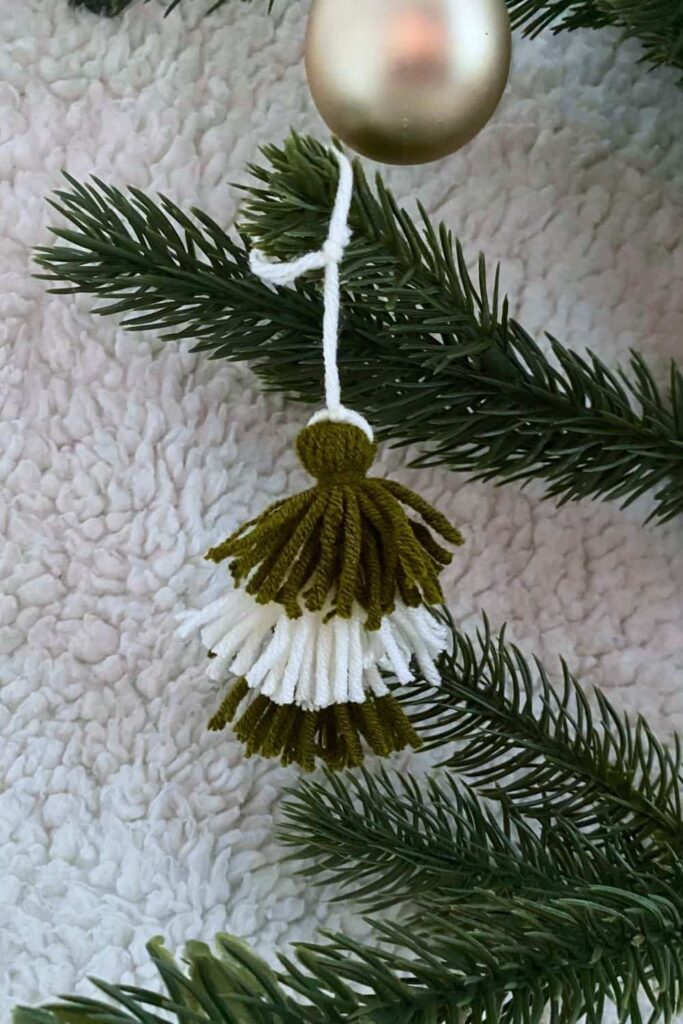
And there you have it! Your handmade yarn tree ornament is ready to hang and enjoy.
Optional: Add Extra Decorations
If you want to make your ornament even fancier, you can add pearls, beads, or a small star at the top. This extra touch can make your DIY ornament stand out even more.


Related
More Like This
- 25 Creative Living Room Graduation Party Ideas for a Memorable Celebration
- 25 Creative At-Home Graduation Party Ideas for a Memorable Celebration
- 25 Creative Garage Graduation Party Ideas You’ll Love
- 25 Creative Graduation Party Table Ideas You’ll Love
- 20 Stunning Floral Graduation Party Ideas for a Memorable Celebration
— SAVE THIS POST —
Did you like this post? If you liked this post, don’t hesitate to share it!
Want to save this post? You can pin the following images on pinterest to save this post.
We are Mary and Eric, the founders of Be Right Back, a blog dedicated to romance around the globe and at home.
We are Mary and Eric, the founders of Be Right Back, a blog dedicated to romance around the globe and at home. With over 10 years of experience in dating and traveling to romantic places, we share our favorite date ideas and romantic destinations to help couples level up their relationships. Having lived in and traveled through the USA, we also share our favourite things to do in the States.
With 70,000 monthly readers and 16,000 followers on social media, Be Right Back is your go-to resource for romantic trip ideas and couple activities at home and abroad.