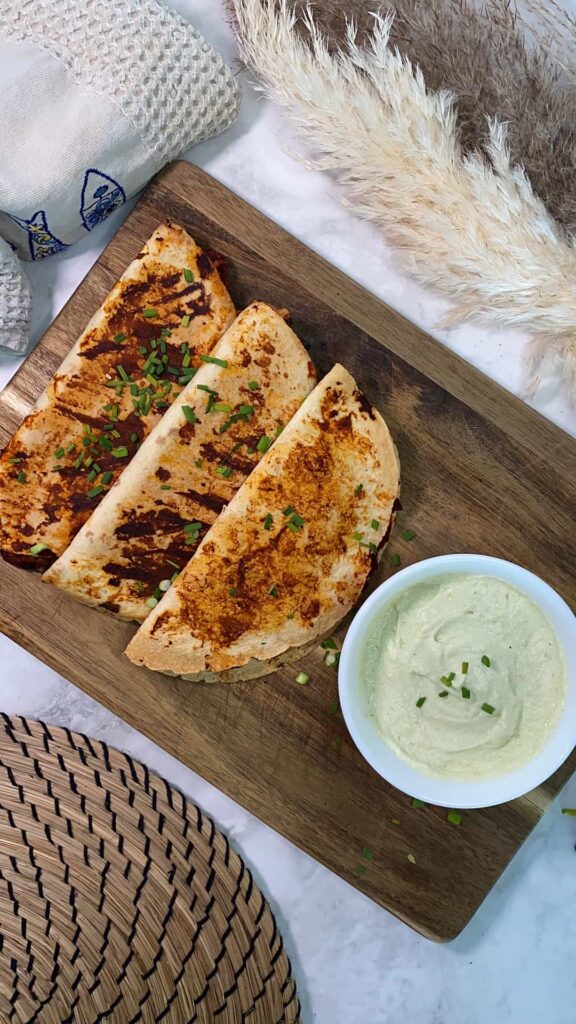
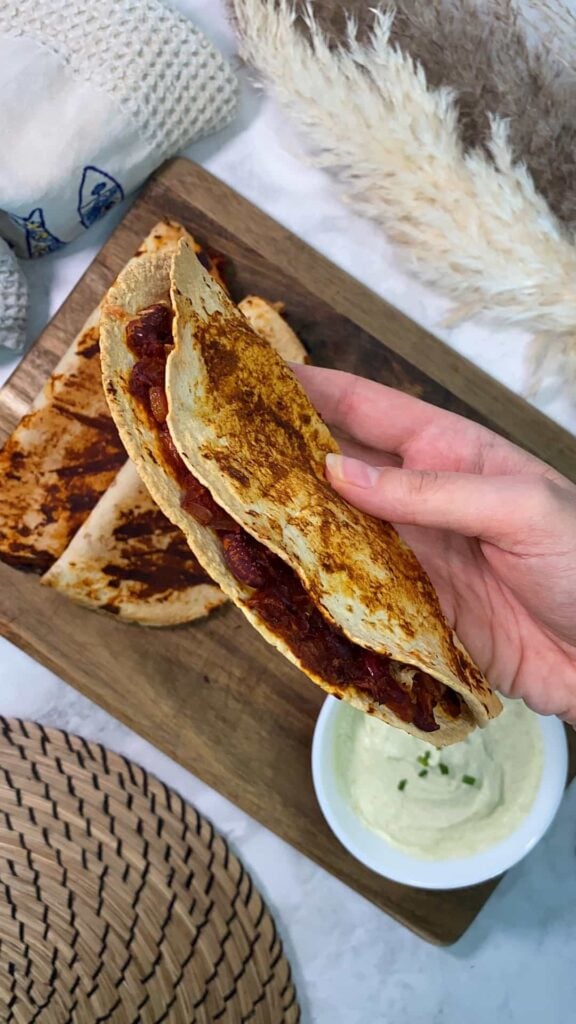
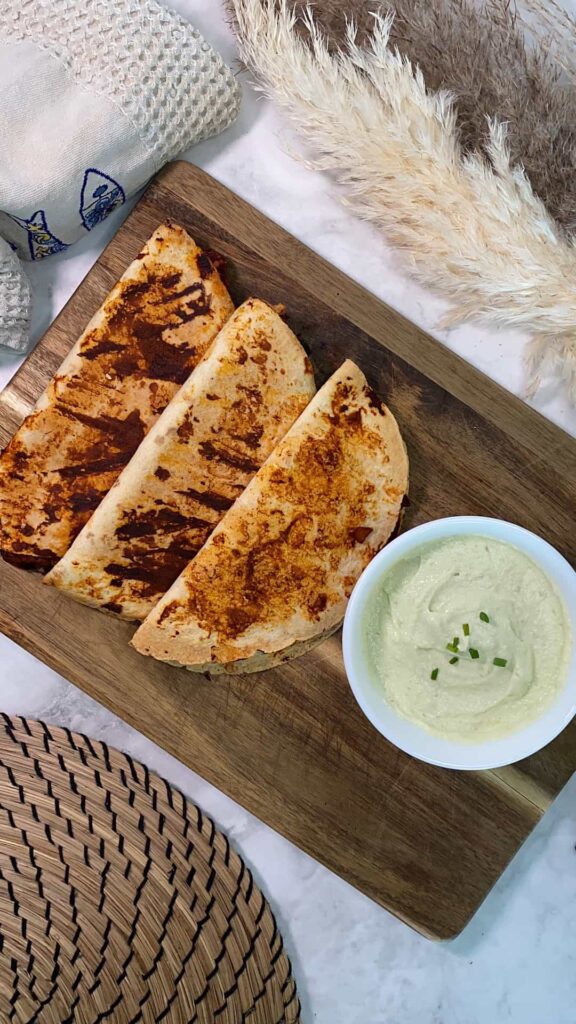
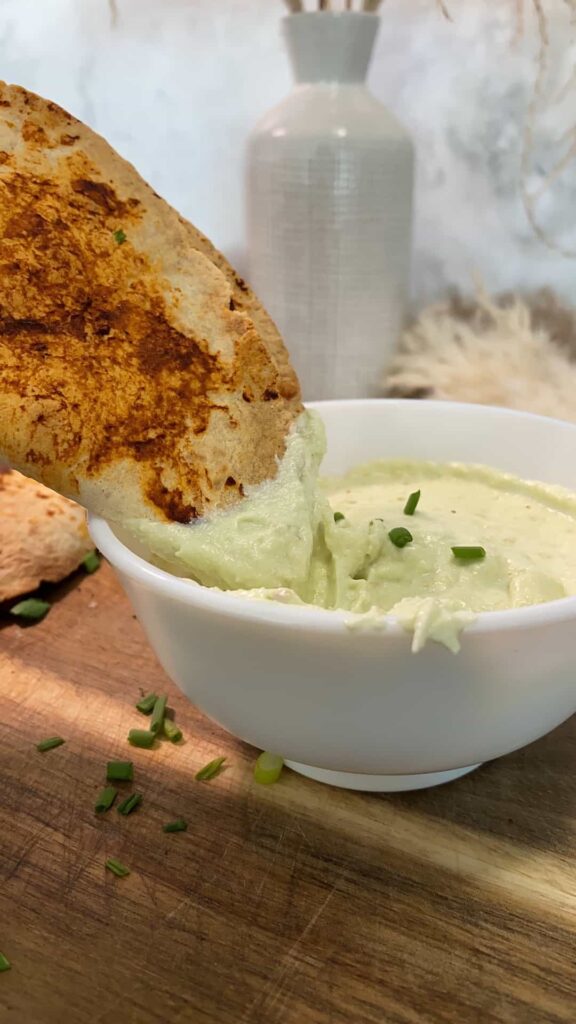
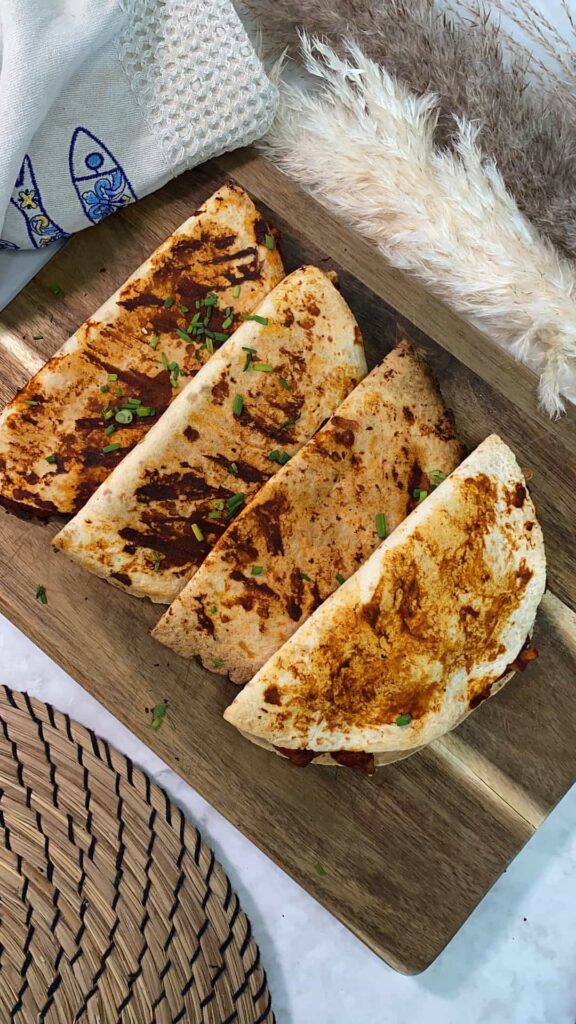
Crispy Black Bean Tacos With Fresh Cottage Cheese Dip
I love a crispy taco situation, and this one always hits the spot—especially when I don’t want to fuss around with too many ingredients. These oven-baked black bean tacos are crispy on the outside, cheesy and flavorful on the inside, and they work for lunch, dinner, or even a late-night snack.
I make them when I want something comforting but still packed with fiber and plant-based protein. Plus, they’re easy to prep in advance, and if you’re anything like me, once you try one, you’ll end up making a second batch before the first one even cools down.
What I like most is how simple these are, but the flavor doesn’t feel basic. That tablespoon of harissa gives the beans just enough heat and depth, and the tomato concentrate thickens the filling so it holds together well when baked. You also get those golden-brown, cheesy edges when the cheese melts and gets crispy where it hits the pan. Honestly, these are one of those recipes that feel like a win every single time.
Related
- High Protein chicken Waffle Burger Recipe
- Rice Paper Spanakopita
- Pepperoni Rice Paper Pizza
- Lettuce, Chorizo And Cheese Rice Paper Wrap
- Rice Paper Chicken Sandwich
A few tips to get them just right:
- Warm your tortillas slightly before filling so they don’t crack when you fold them. You can do this in a dry pan or microwave for 20–30 seconds.
- Don’t skip dipping the tortillas lightly in the bean mixture—it helps them crisp up in the oven and gives that outer layer more flavor.
- Press the tacos down slightly before baking so they hold their shape and get nice and toasty on both sides.
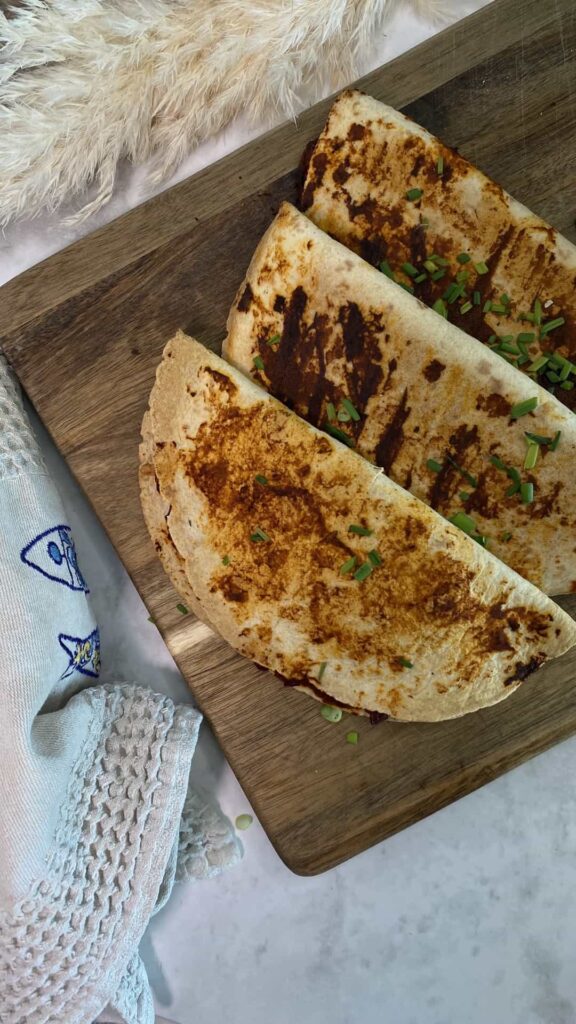
- Flip halfway through baking for an even crisp. You want that golden color on both sides.
- These work great with any canned beans, but I usually go with black beans because the texture is just right.
Ingredients
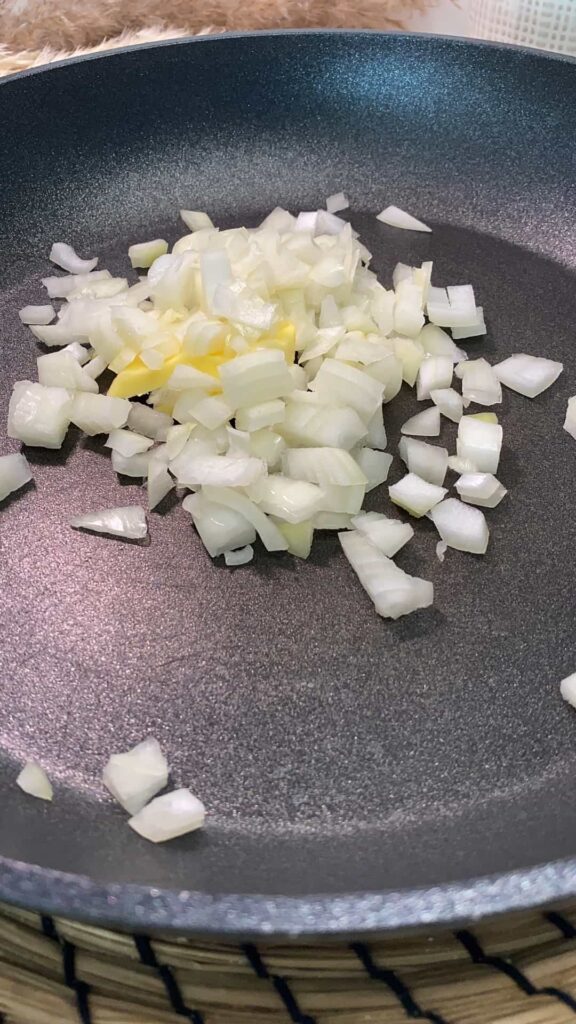
- 1 onion, finely chopped
- 1 tbsp butter (14g)
- A handful of chives, chopped
- 1 tbsp harissa paste (15g)
- 1 can (400g / 14 oz) of black beans or red kidney beans, drained
- 3 tbsp tomato concentrate (45g)
- Juice of 1 lemon or lime
- Small corn tortillas (8–10 pieces)
- Shredded cheese (about 1–1.5 cups / 100–150g)
Alternative ingredients
You can use red kidney beans instead of black beans—they mash just as well and have a slightly different flavor.
If you don’t have harissa paste, you can sub in chipotle paste or even a bit of smoked paprika and chili flakes.
Butter can be swapped with olive oil if you want a dairy-free version.
For a dairy-free taco, just skip the cheese or use a vegan cheese that melts well.
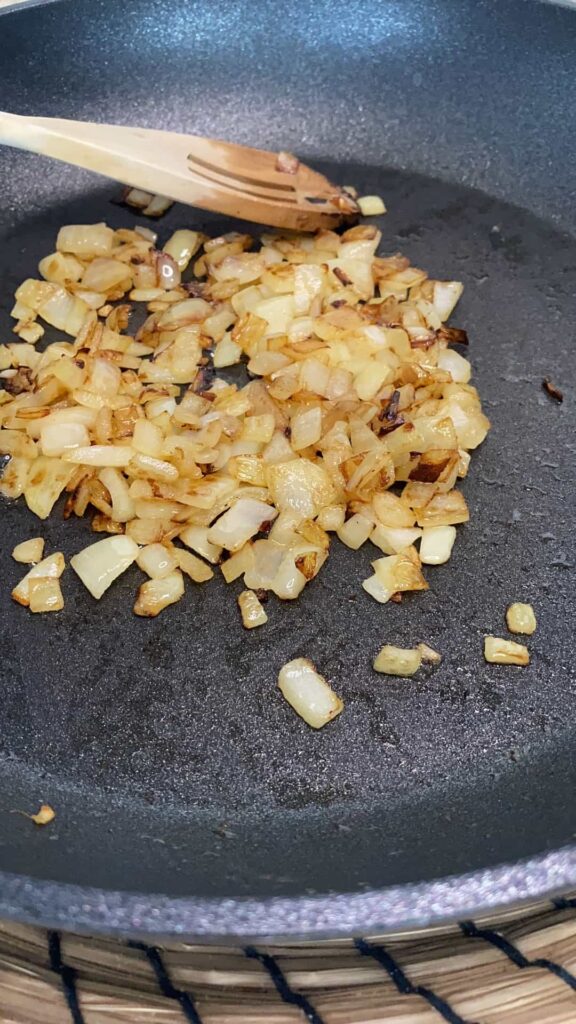
Step 1: Sauté the onions
In a pan, melt the butter over medium heat. Add the chopped onion and cook until golden brown and slightly caramelized. This usually takes about 7–10 minutes.
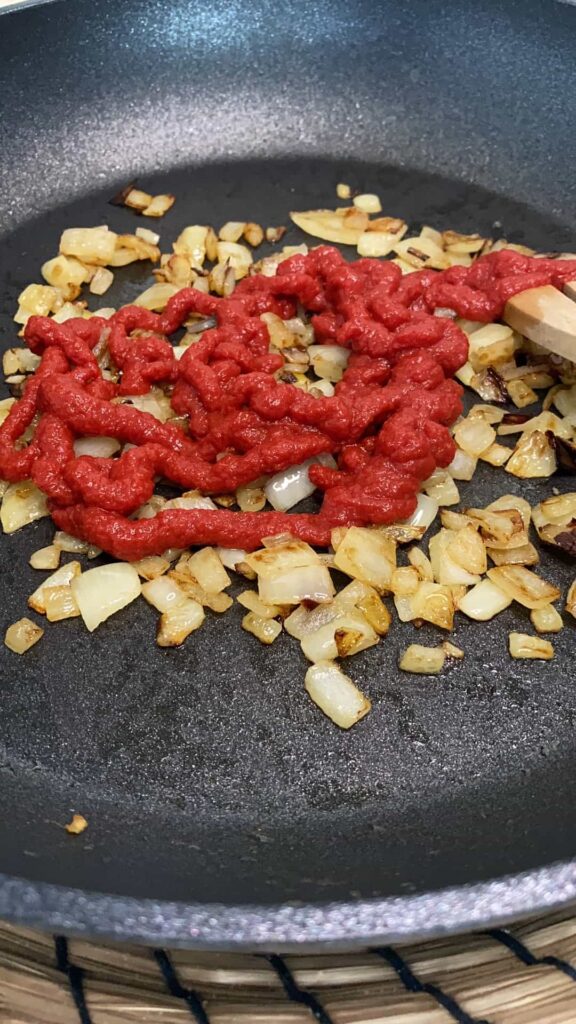
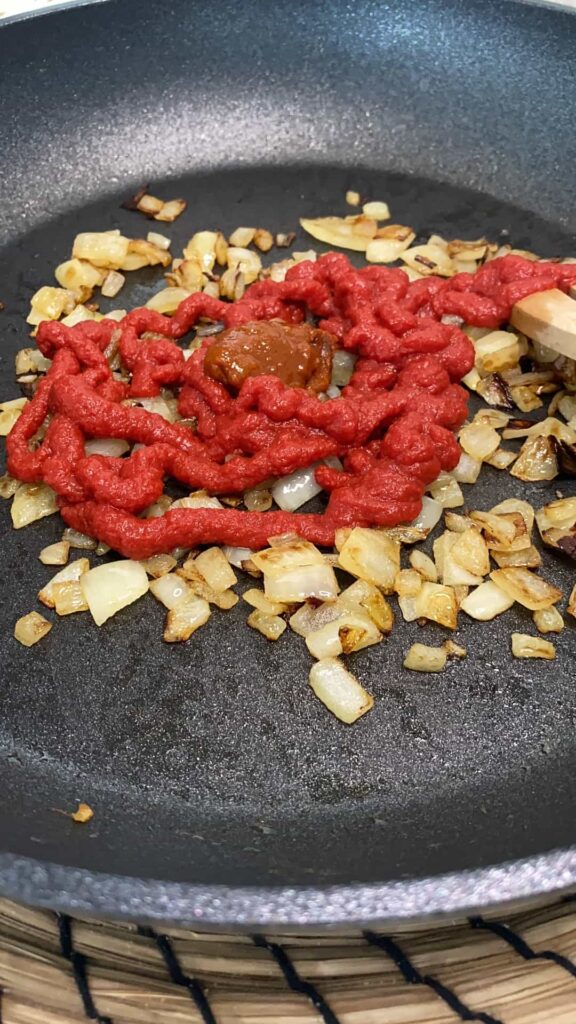
Step 2: Build the bean filling
Add the tomato concentrate and harissa paste to the pan. Stir everything together for about 1–2 minutes so the flavors start to come together.

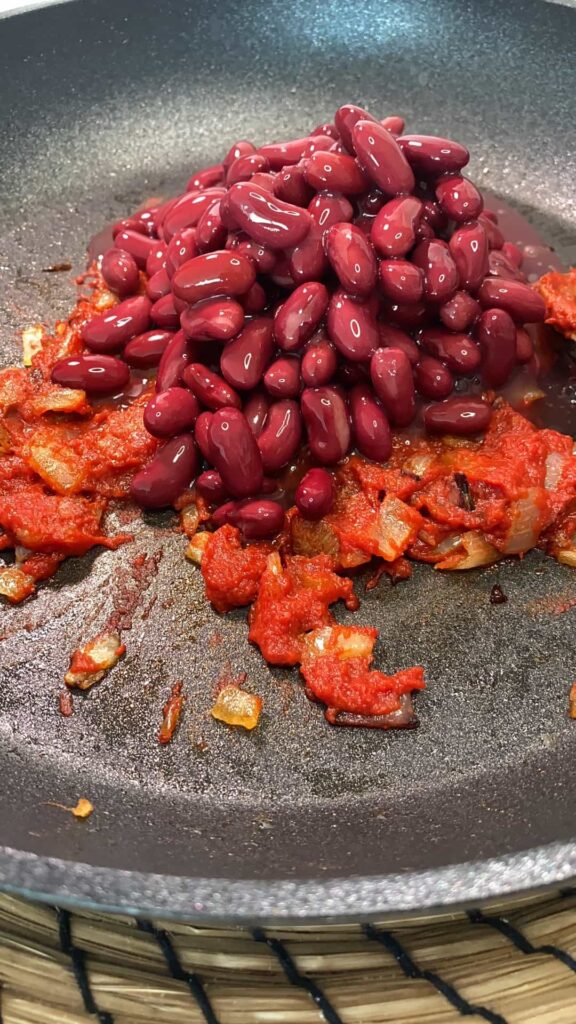
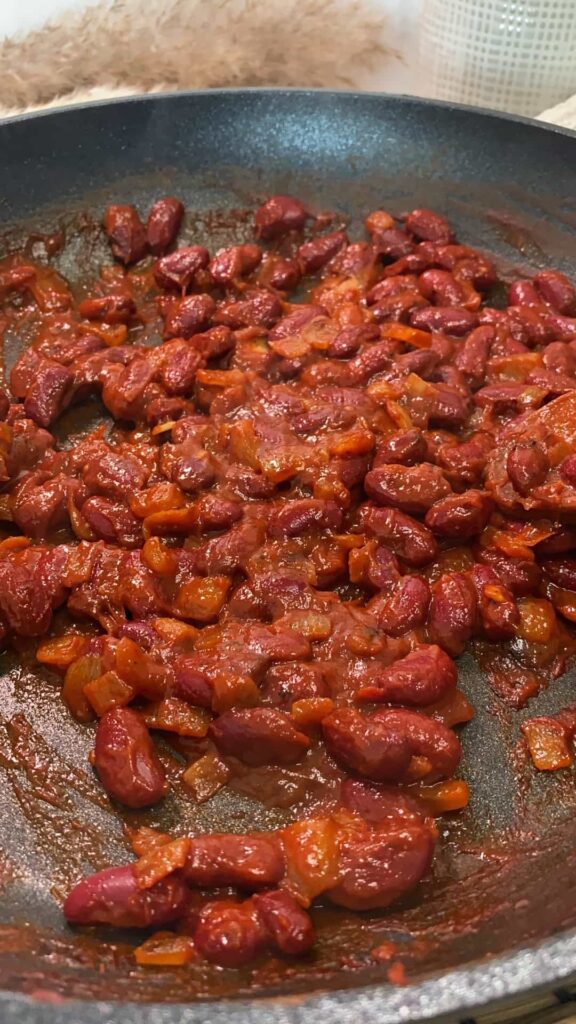
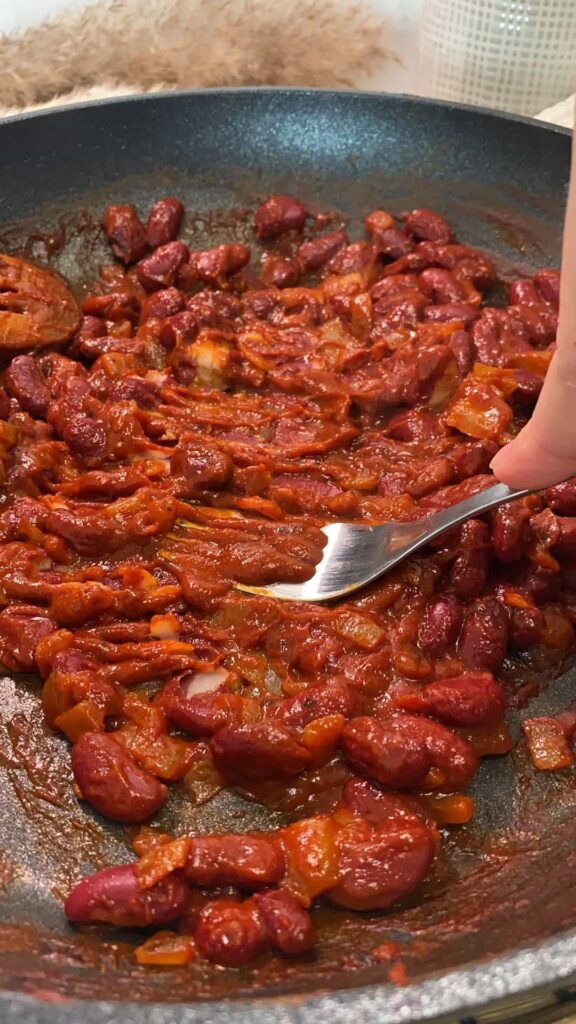
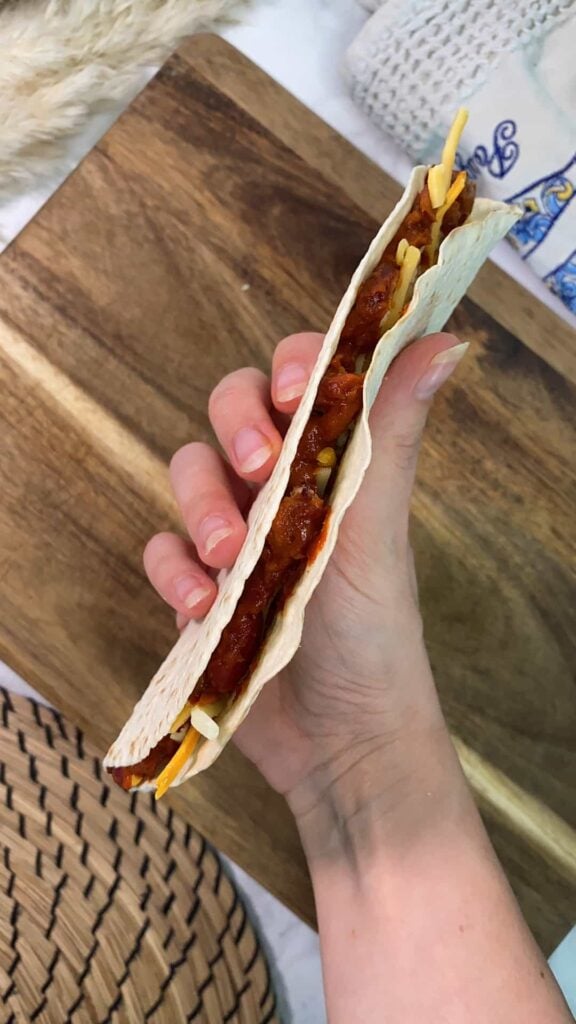
Step 3: Add and mash the beans
Pour in your drained can of beans. Stir, then mash them up with the back of a spoon or a potato masher. Add a squeeze of lime or lemon juice and keep mixing until the filling is thick but still a little chunky. Turn off the heat and stir in the chopped chives.

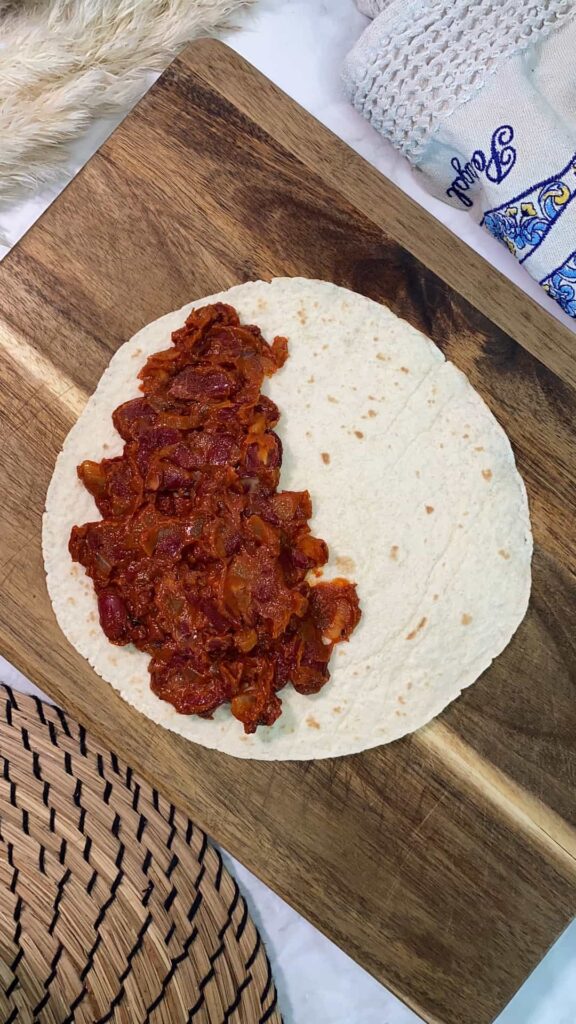
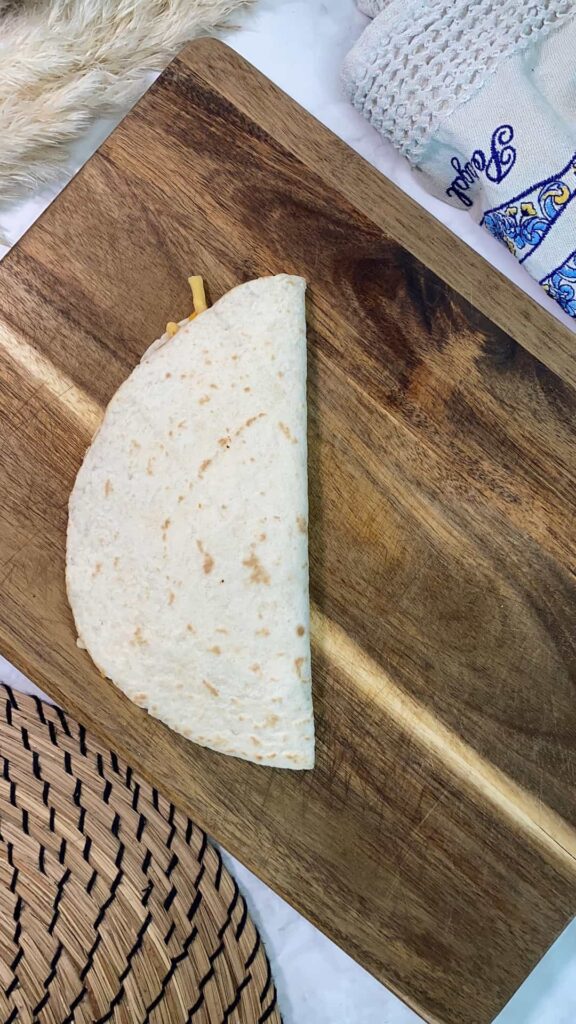
Step 4: Prep the tortillas
Warm up your tortillas for a few seconds in a dry pan or microwave so they’re flexible. Take each one and lightly dip one side into the bean mix to coat it with a bit of flavor and moisture.
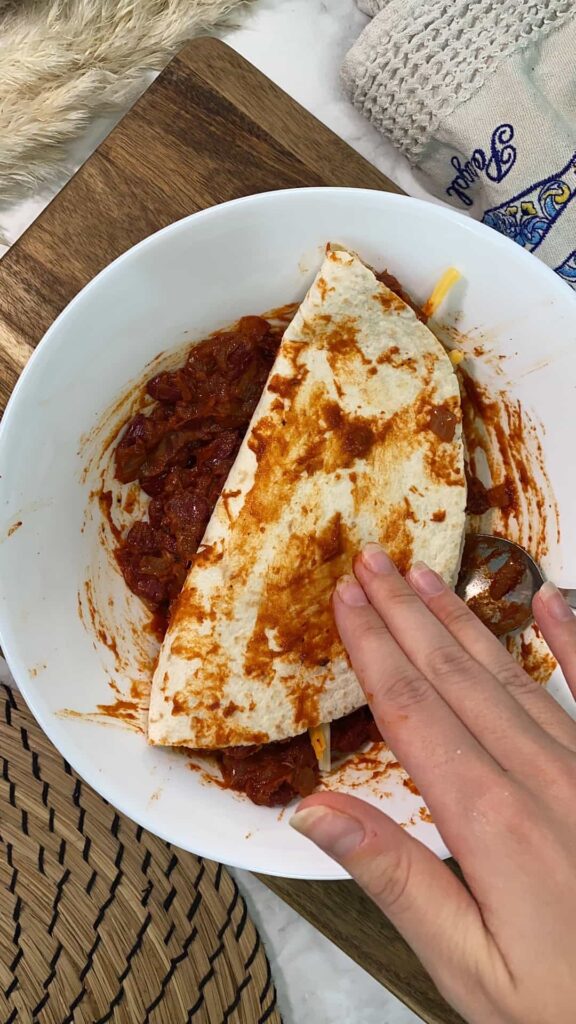
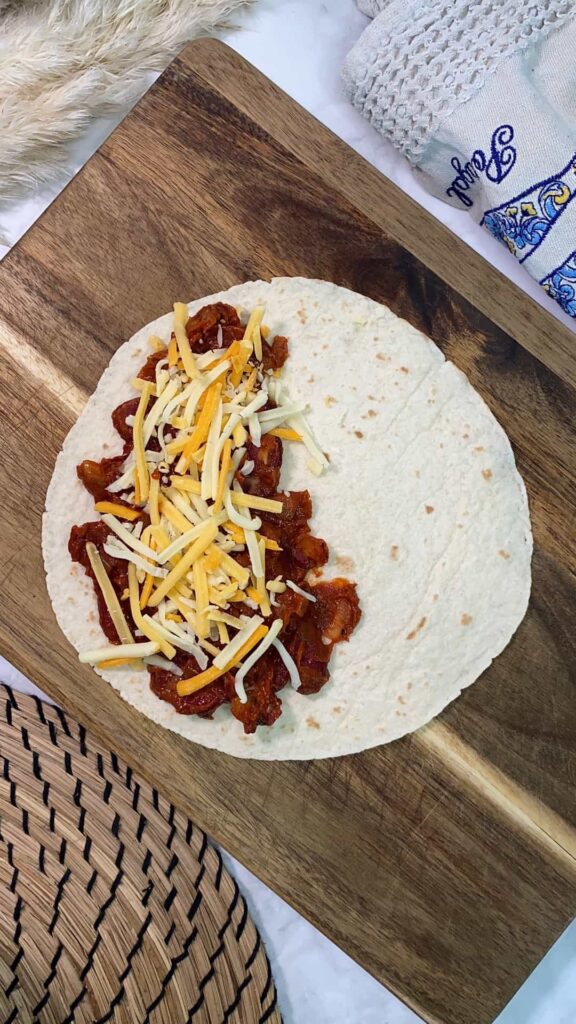
Step 5: Fill and fold
Place some of the bean mixture on the non-dipped side of the tortilla. Add a layer of shredded cheese. Fold it over and press down lightly to help it stay closed.

Step 6: Bake until crispy
Preheat your oven to 190°C (375°F). Arrange the tacos in a baking dish or sheet pan. Bake for 15 minutes on one side, then flip and bake for another 15 minutes. They should be golden and crisp on both sides.
How to conserve the recipe
These tacos actually store pretty well. Once baked, you can keep them in the fridge for up to 3 days. To reheat, I recommend popping them back in the oven or an air fryer at 180°C (350°F) for about 8–10 minutes. That brings the crispiness right back. You can freeze them too—just wrap them individually in foil or parchment and place them in a freezer bag. When ready to eat, bake directly from frozen at 190°C (375°F) for about 25 minutes, flipping halfway.
Different ways to serve the dish
These are so versatile. You can serve them as a main dish with a side of guacamole, salsa, or sour cream. They also work great as party snacks if you cut them in half and serve with dipping sauces. I’ve packed them for road trips too—they’re easy to grab and eat on the go. Want to serve them as an appetizer? Make mini versions with smaller tortillas or cut large ones into quarters before folding. They’re great for lunchboxes as well, especially if you have access to a toaster oven or microwave. Just reheat and you’re set. You can even make a taco bar out of them and let everyone pick their toppings before folding and baking.
— SAVE THIS POST —
Did you like this post? If you liked this post, don’t hesitate to share it!
Want to save this post? You can pin the following images on pinterest to save this post.
We are Mary and Eric, the founders of Be Right Back, a blog dedicated to romance around the globe and at home.
We are Mary and Eric, the founders of Be Right Back, a blog dedicated to romance around the globe and at home. With over 10 years of experience in dating and traveling to romantic places, we share our favorite date ideas and romantic destinations to help couples level up their relationships. Having lived in and traveled through the USA, we also share our favourite things to do in the States.
With 70,000 monthly readers and 16,000 followers on social media, Be Right Back is your go-to resource for romantic trip ideas and couple activities at home and abroad.