14 Easy Finger Food Appetizers for Your Next Gathering
No gathering is complete without some tasty finger food appetizers to munch on! These bite-sized treats are totally easy to whip up and perfect for sharing, whether you’re hosting a party or just want to snack while watching a movie.
From savory sliders to crispy bites, we’ve got a range of options that will please every palate. Plus, you won’t need to spend all day in the kitchen to impress your guests.
In this post, you’ll find 14 easy finger food appetizers that pack a lot of flavor into small portions. Each recipe is designed to be simple, with ingredients you can easily find in your pantry or local store. We’ll even break it down for you with easy-to-follow instructions. So grab your apron, invite some friends over, and let’s get those tasty bites prepared!
Crispy Baked Zucchini Fries
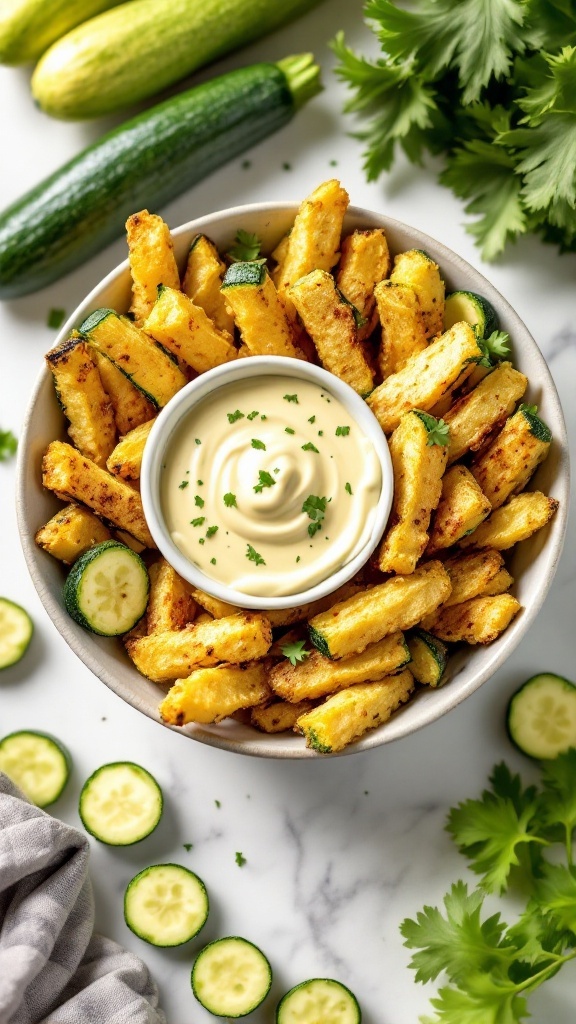
Crispy baked zucchini fries are a delicious and healthier alternative to traditional fries. They boast a satisfying crunch on the outside while staying tender on the inside. This recipe is simple to make and requires minimal effort, making it a perfect choice for snacks, parties, or even as a side dish.
The combination of breadcrumbs and seasonings creates a flavorful coating that complements the natural taste of zucchini. Paired with your favorite dip, these fries are bound to become a hit at any gathering. Plus, they’re a great way to sneak in some veggies!
Ingredients
- 2 medium zucchinis (about 350 grams)
- 1 cup breadcrumbs (about 100 grams)
- 1/2 cup grated Parmesan cheese (about 50 grams)
- 1 teaspoon garlic powder
- 1 teaspoon onion powder
- 1/2 teaspoon salt
- 1/4 teaspoon black pepper
- 2 large eggs
- 1 tablespoon olive oil (about 15 ml)
Instructions
- Preheat the oven to 220°C (425°F) and line a baking sheet with parchment paper.
- Slice the zucchinis into fry-shaped pieces, about 1 cm thick.
- In a bowl, combine breadcrumbs, Parmesan cheese, garlic powder, onion powder, salt, and pepper.
- In another bowl, beat the eggs and add olive oil.
- Dip each zucchini piece into the egg mixture, allowing excess to drip off, then coat with the breadcrumb mixture.
- Place the coated zucchini fries on the prepared baking sheet in a single layer.
- Bake for 20-25 minutes, flipping halfway through, until golden and crispy.
- Serve hot with your favorite dipping sauce.
Deviled Eggs with Spicy Mustard

Deviled eggs are a classic finger food that everyone loves. They are creamy, tangy, and can be made with a kick of heat by adding spicy mustard. The rich yolk filling blends perfectly with the mustard, giving each bite a delightful zing. Not only are they simple to prepare, but they also look appealing on any appetizer platter.
Perfect for gatherings, these deviled eggs are sure to impress your guests. With the right balance of flavors, they can elevate any snack time. Plus, they can be made ahead of time, making them a convenient choice for busy days. Let’s get cooking!
Ingredients
- 6 large eggs
- 3 tablespoons mayonnaise
- 1 tablespoon spicy mustard
- 1 teaspoon apple cider vinegar
- Salt and pepper to taste
- Paprika for garnish
Instructions
- Boil the Eggs: Place the eggs in a pot, cover with water, and bring to a boil. Once boiling, cover and remove from heat. Let them stand for 12 minutes.
- Cool and Peel: Transfer the eggs to an ice bath for about 5 minutes. Once cool, peel the eggs gently.
- Prepare the Filling: Slice the eggs in half lengthwise. Remove the yolks and place them in a bowl. Mash the yolks with mayonnaise, spicy mustard, apple cider vinegar, salt, and pepper until smooth.
- Fill the Egg Whites: Spoon or pipe the yolk mixture back into the egg white halves.
- Garnish: Sprinkle paprika on top for a pop of color and extra flavor before serving.
Bruschetta with Tomato and Basil
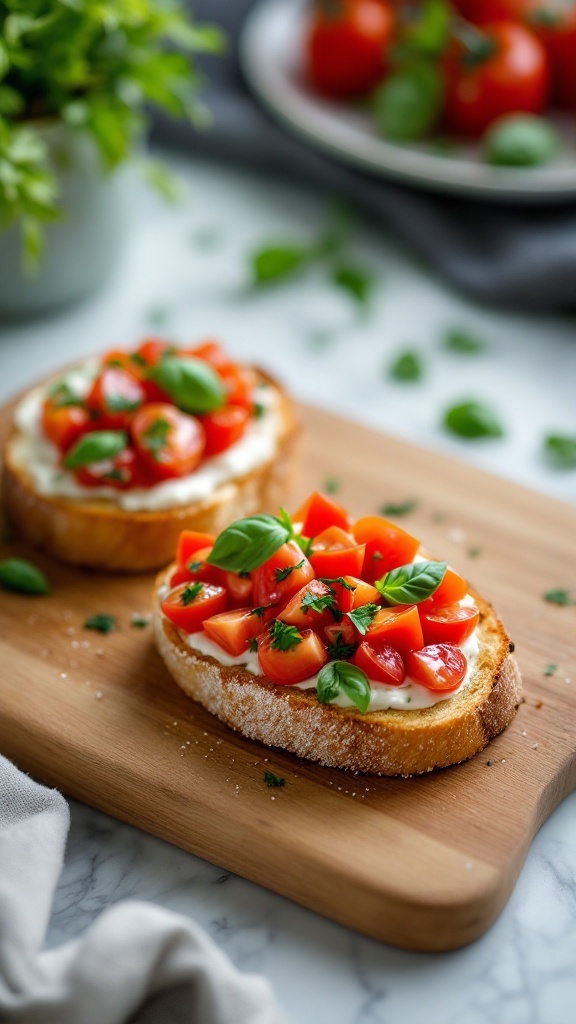
Bruschetta with tomato and basil is a classic Italian appetizer that’s as delightful to eat as it is simple to prepare. The combination of fresh tomatoes, aromatic basil, and crusty bread brings a burst of flavor in every bite. With its vibrant colors and refreshing taste, bruschetta makes for a wonderful starter that’s perfect for gatherings or a cozy night in.
This finger food is not only delicious but also quick to whip up. Just toast some bread, mix fresh ingredients, and assemble them together. It’s a great option for both seasoned cooks and beginners looking to impress their guests without spending hours in the kitchen.
Ingredients
- 4 slices of ciabatta or baguette
- 2 large ripe tomatoes, diced
- Cream cheese
- 1 clove garlic, minced
- 1 tablespoon olive oil
- Fresh basil leaves, torn
- Salt and pepper to taste
- Balsamic glaze (optional)
Instructions
- Preheat the oven to 200°C (400°F). Place the bread slices on a baking sheet and drizzle with olive oil. Toast in the oven for about 5-7 minutes until golden and crispy.
- In a bowl, combine the diced tomatoes, minced garlic, torn basil, salt, and pepper. Drizzle with a little more olive oil and mix well.
- Once the bread is toasted, remove it from the oven and let it cool slightly. Spread some cream cheese on each slices. You can also cut each slice into smaller bites. Top each slice with the tomato mixture.
- If desired, drizzle balsamic glaze over the bruschetta for added flavor.
- Serve immediately and enjoy the fresh taste of this delicious appetizer!
Stuffed Mini Peppers with Cream Cheese

Stuffed mini peppers make for a delightful appetizer that’s both colorful and tasty. These little bites are filled with a creamy, flavorful filling that complements the natural sweetness of the peppers. Not only are they visually appealing, but they are also simple to prepare and a hit at any gathering.
The combination of fresh bell peppers and rich cream cheese creates a satisfying contrast. You can customize the fillings with various herbs and spices for an extra kick. Perfect for parties or a quick snack, these stuffed mini peppers are sure to please everyone!
Ingredients
- 12 mini bell peppers (mixed colors)
- 250 grams (8 oz) cream cheese, softened
- 50 grams (1/2 cup) shredded cheddar cheese
- 1 tablespoon fresh chives, chopped
- 1 tablespoon fresh cilantro, chopped
- 1/2 teaspoon garlic powder
- Salt and pepper to taste
Instructions
- Preheat your oven to 180°C (350°F).
- Slice the mini peppers in half lengthwise and remove the seeds.
- In a mixing bowl, combine the softened cream cheese, cheddar cheese, chives, cilantro, garlic powder, salt, and pepper. Mix until well blended.
- Stuff each pepper half with the cream cheese mixture, pressing down gently to pack it in.
- Place the stuffed peppers on a baking sheet and bake for 15-20 minutes until the cheese is slightly bubbly and the peppers are tender.
- Remove from the oven and let cool for a few minutes before serving. Enjoy!
Caprese Skewers with Balsamic Glaze
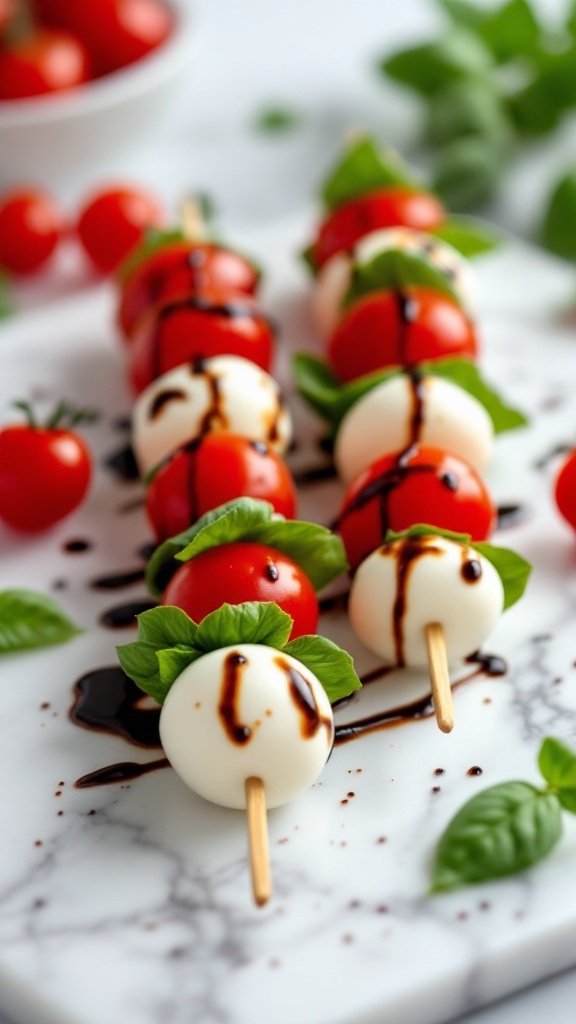
Caprese skewers are a delightful and colorful appetizer that brings the classic Italian Caprese salad to a fun and easy-to-eat format. These bite-sized treats combine fresh mozzarella balls, juicy cherry tomatoes, and fragrant basil leaves, all drizzled with a rich balsamic glaze. The combination of creamy, tangy, and fresh flavors makes them a perfect addition to any gathering, from casual get-togethers to elegant soirées.
Making Caprese skewers is a breeze, requiring just a few simple ingredients and minimal prep time. They can be assembled in under 15 minutes, making them an ideal choice for last-minute entertaining. Plus, they look stunning on any platter, so you can impress your guests without much effort!
Ingredients
- 250g (9 oz) fresh mozzarella balls
- 250g (9 oz) cherry tomatoes
- 1 bunch fresh basil leaves
- 100ml (3.4 fl oz) balsamic glaze
- Salt and pepper to taste
- Skewers or toothpicks
Instructions
- Gather all your ingredients and prepare the skewers by laying them out on a serving platter.
- Thread one mozzarella ball onto each skewer, followed by a basil leaf and a cherry tomato.
- Repeat the process until all ingredients are used up, alternating the order if desired.
- Drizzle the balsamic glaze over the skewers, adding salt and pepper to taste.
- Serve immediately and enjoy your flavorful, easy-to-make appetizer!
Savory Spinach and Feta Puffs

Savory Spinach and Feta Puffs are a delightful combination of flaky pastry and rich, flavorful filling. The earthy taste of spinach pairs beautifully with the tangy feta cheese, creating a scrumptious bite-sized treat that’s perfect for any gathering. These puffs are not only delicious but also super easy to whip up, making them a fantastic choice for both seasoned cooks and kitchen novices alike.
These tasty treats are baked until golden brown, providing a crispy exterior that complements the soft and cheesy filling inside. Ideal for parties, they can be served warm or at room temperature, making them versatile for any occasion. Plus, they’re a great way to sneak in some greens!
Ingredients
- 300g fresh spinach (10 oz)
- 200g feta cheese, crumbled (7 oz)
- 1 cup ricotta cheese
- 1 egg
- 1 tablespoon olive oil
- 1 teaspoon garlic powder
- Salt and pepper, to taste
- 1 package of puff pastry (about 500g / 1 lb)
- 1 egg (for egg wash)
Instructions
- Preheat your oven to 200°C (400°F).
- In a pan, heat the olive oil over medium heat. Add the fresh spinach and sauté until wilted. Remove from heat and let cool slightly.
- In a bowl, combine the wilted spinach, feta cheese, ricotta cheese, one egg, garlic powder, salt, and pepper. Mix until well combined.
- Roll out the puff pastry on a floured surface and cut into squares, about 10cm x 10cm (4 inches x 4 inches).
- Place a spoonful of the spinach mixture in the center of each square. Fold the corners over and pinch to seal.
- Place on a lined baking tray and brush with the beaten egg.
- Bake for 20-25 minutes or until golden brown. Serve warm or at room temperature.
Shrimp Cocktail with Lemon Wedges
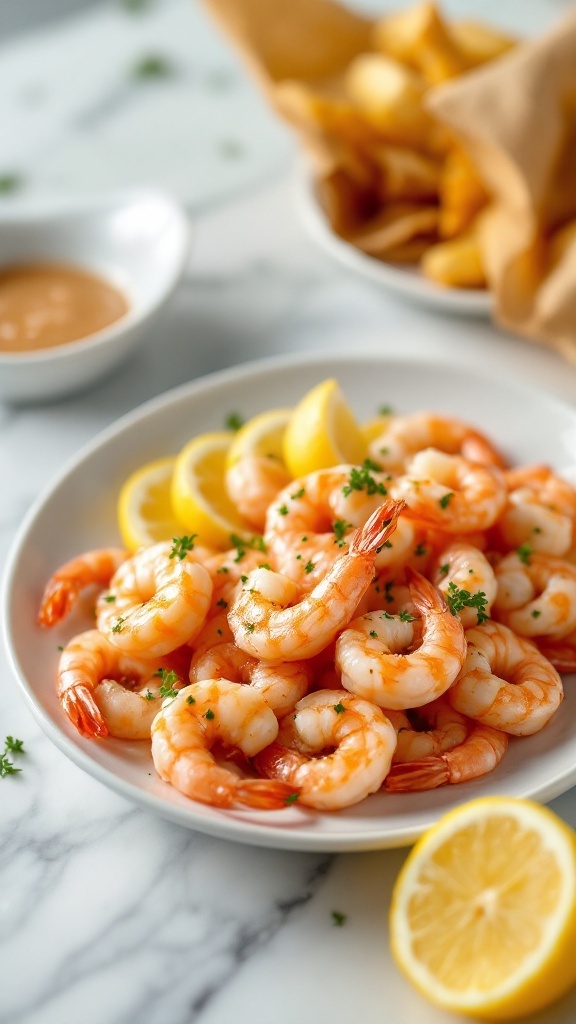
Shrimp cocktail is a classic appetizer that’s always a hit at gatherings. Light and refreshing, this dish features tender shrimp that are perfectly cooked and served with zesty lemon wedges for that extra zing. It’s incredibly easy to make, taking just a few minutes to prepare, making it perfect for both casual get-togethers and fancy occasions.
The combination of the succulent shrimp and the bright lemon creates a delightful balance of flavors. Serve it chilled with your favorite dipping sauce, and you have a finger food that’s sure to impress your guests!
Ingredients
- 500 grams (1 lb) large shrimp, peeled and deveined
- 1 liter (4 cups) water
- 1 tablespoon salt
- 1 tablespoon lemon juice
- 1 teaspoon Old Bay seasoning (optional)
- 2 lemons, cut into wedges
- Fresh parsley, for garnish
Instructions
- Prepare the Cooking Liquid: In a large pot, combine water, salt, lemon juice, and Old Bay seasoning. Bring to a boil.
- Cook the Shrimp: Add the shrimp to the boiling water. Cook for 2-3 minutes until they turn pink and opaque. Be careful not to overcook them.
- Chill the Shrimp: Remove the shrimp from the pot and transfer them to a bowl of ice water to stop the cooking process. Let them cool for a few minutes.
- Serve: Drain the shrimp and arrange them on a platter. Garnish with lemon wedges and parsley. Enjoy with your favorite dipping sauce!
Vegetable Spring Rolls with Peanut Sauce
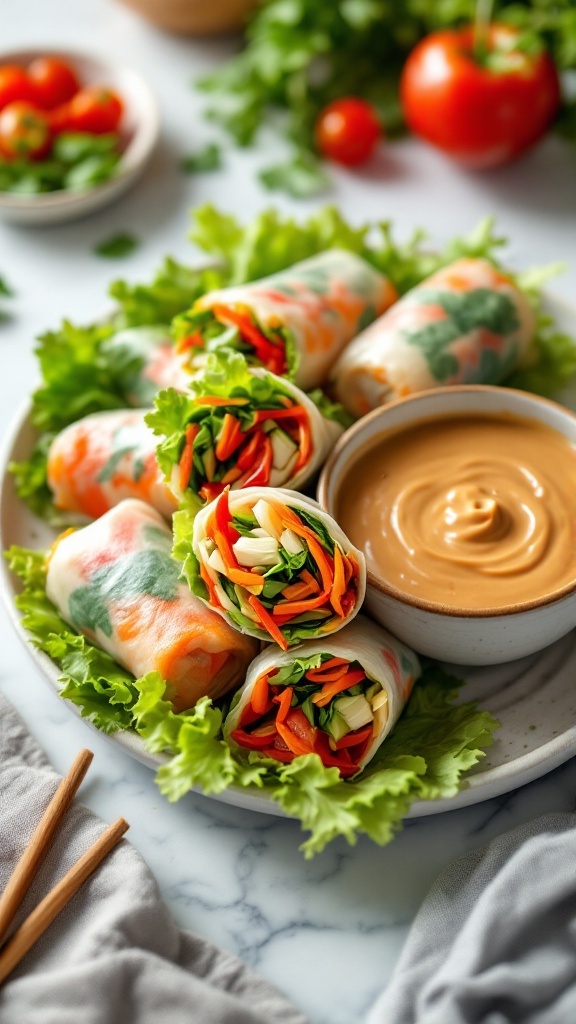
Vegetable spring rolls are a fresh and crunchy appetizer that everyone loves. Packed with colorful veggies, they’re not just tasty but also light and healthy. The addition of peanut sauce gives these rolls a creamy and nutty flavor that complements the freshness of the vegetables perfectly.
Making these spring rolls is simple and fun, making them a great choice for parties or as a snack. You can customize the filling with your favorite vegetables, and the peanut sauce can be whipped up in no time. Not only are they visually appealing, but they also offer a burst of flavors in every bite!
Ingredients
- 10 rice paper wraps
- 1 cup shredded lettuce
- 1/2 cup grated carrots
- 1/2 cup sliced bell peppers (red, yellow, or green)
- 1/2 cup cucumber, julienned
- 1/4 cup fresh cilantro leaves
- 1/4 cup peanut butter
- 2 tablespoons soy sauce
- 1 tablespoon honey
- 1 tablespoon lime juice
- Water for soaking rice paper
Instructions
- Prepare the Peanut Sauce: In a bowl, mix peanut butter, soy sauce, honey, and lime juice until smooth. Set aside.
- Soak the Rice Paper: Fill a shallow dish with warm water. Dip one rice paper wrap in the water for about 10-15 seconds until it’s soft and pliable.
- Fill the Wrap: Place the softened rice paper on a clean surface. From experience, it’s sometimes worth overlapping two layers to make your rolls stronger. It’s highly dependent on the rice paper brand you use! Layer the lettuce, carrots, bell peppers, cucumber, and cilantro in the center.
- Roll It Up: Tuck the sides of the rice paper over the filling and roll tightly from the bottom up. Repeat with remaining wraps and filling.
- Serve: Arrange the spring rolls on a platter with the peanut sauce for dipping.
Mini Quiches with Spinach and Cheese

Mini quiches with spinach and cheese are a delightful finger food that combines creamy, cheesy goodness with a hint of earthy spinach. They are easy to make and perfect for gatherings, making them a favorite among guests and hosts alike.
The buttery crust holds a savory filling that’s both satisfying and light, making them ideal for any occasion, from brunch to parties. Plus, they can be made in advance and served warm or at room temperature, adding to their convenience. These mini quiches are sure to impress your friends and family with their taste and presentation!
Ingredients
- 1 cup fresh spinach, chopped (about 30g)
- 1 cup shredded cheese (cheddar or mozzarella, about 100g)
- 4 large eggs
- 1 cup milk (240ml)
- 1/2 teaspoon salt
- 1/4 teaspoon black pepper
- 1 pre-made pie crust (or puff pastry)
Instructions
- Preheat the oven to 375°F (190°C).
- Roll out the pie crust and cut it into small circles to fit a mini muffin tin. Press each circle into the tin.
- In a mixing bowl, whisk together the eggs, milk, salt, and pepper until well combined.
- Add the chopped spinach and shredded cheese to the egg mixture and stir until evenly distributed.
- Pour the filling into each pie crust, filling them about 3/4 full.
- Bake in the preheated oven for 20-25 minutes, or until the quiches are set and lightly golden on top.
- Let them cool slightly before removing from the tin. Serve warm or at room temperature.
Cheese and Charcuterie Board

A cheese and charcuterie board is a delightful way to serve a variety of flavors and textures, making it an ideal finger food appetizer. This spread typically features an assortment of cheeses, cured meats, nuts, fruits, and sometimes even spreads like honey or mustard. With its colorful presentation and diverse offerings, it invites guests to mix and match their favorite combinations, whether they prefer creamy Brie or tangy blue cheese.
The best part about creating a cheese and charcuterie board is that it’s incredibly simple to assemble. You don’t need to be a culinary expert to put together a visually appealing and delicious spread! Just gather your favorite ingredients, arrange them thoughtfully on a platter, and you’re ready to impress. Let’s dive into the ingredients and instructions to craft your very own cheese and charcuterie board!
Ingredients
- 200 g assorted cheeses (e.g., cheddar, Brie, goat cheese)
- 150 g cured meats (e.g., salami, prosciutto)
- 100 g mixed nuts (e.g., almonds, walnuts)
- 150 g fresh fruits (e.g., grapes, berries)
- 100 g olives
- 50 g honey or fig jam
- 1 baguette or crackers
Instructions
- Select a large wooden or marble board for your display.
- Begin by placing the cheeses at different points on the board, arranging them in varying shapes.
- Add the cured meats, folding or rolling them for an appealing look.
- Fill in gaps with nuts and fresh fruits, offering a burst of color.
- Add small bowls for olives and honey or jam, ensuring easy access.
- Finally, slice the baguette or arrange crackers around the board for guests to enjoy.
Teriyaki Chicken Skewers
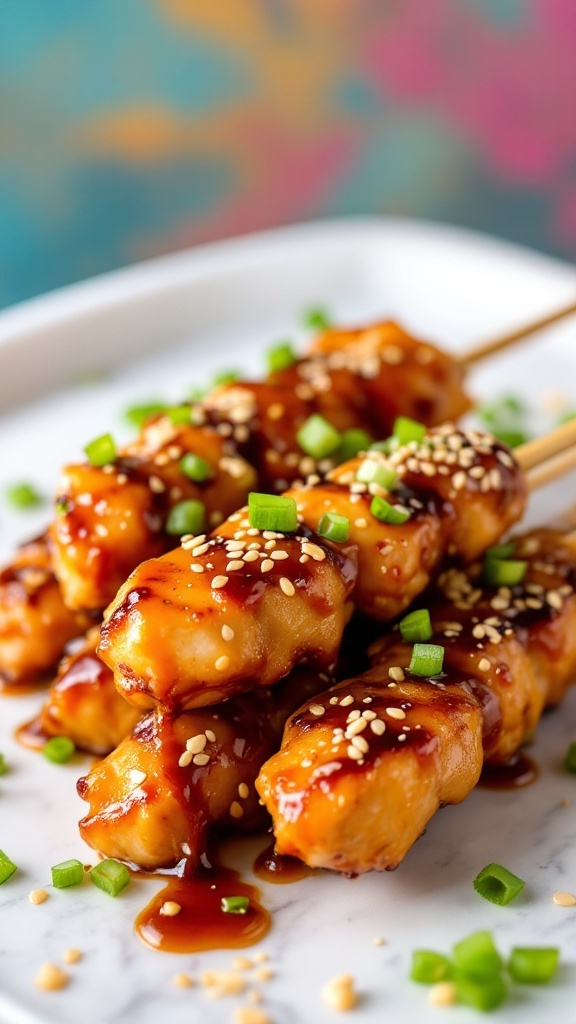
Teriyaki chicken skewers are a savory treat that packs a flavorful punch. The combination of tender chicken pieces marinated in a sweet and tangy teriyaki sauce makes these skewers delightful for any occasion. Plus, they’re easy to make, making them a great choice for gatherings or family dinners.
With a quick marinade and simple cooking method, you can whip these up in no time. The result is juicy, flavor-packed chicken that’s perfect for snacking or serving as a main dish. Don’t forget to garnish them with sesame seeds and green onions for an extra touch!
Ingredients
- 500g (1 lb) chicken breast, cut into bite-sized pieces
- 120ml (1/2 cup) teriyaki sauce
- 2 tablespoons honey
- 1 tablespoon soy sauce
- 1 tablespoon sesame oil
- 2 green onions, chopped
- 1 tablespoon sesame seeds
- Skewers (soaked in water if wooden)
Instructions
- Combine the teriyaki sauce, honey, soy sauce, and sesame oil in a bowl to create the marinade.
- Add the chicken pieces to the marinade and let them sit for at least 30 minutes.
- Preheat your grill or grill pan over medium heat.
- Thread the marinated chicken onto the skewers, leaving a bit of space between each piece.
- Grill the skewers for about 10-12 minutes, turning occasionally, until the chicken is cooked through.
- Remove from heat, sprinkle with chopped green onions and sesame seeds before serving.
Bacon-Wrapped Dates Stuffed with Almonds
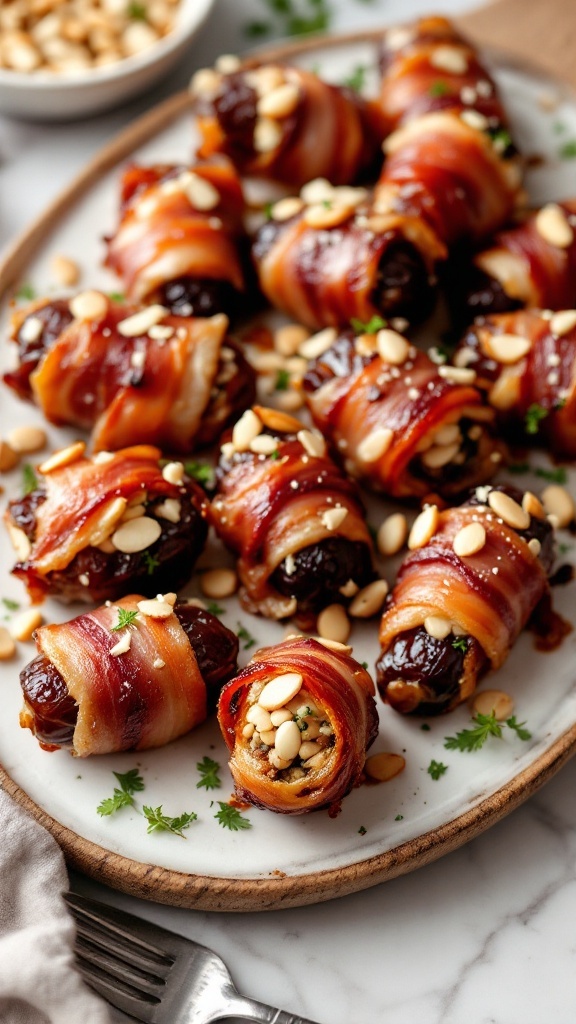
Bacon-wrapped dates stuffed with almonds combine sweet and savory flavors in a delightful bite-sized snack. The sweetness of the dates perfectly contrasts with the salty, crispy bacon, while the almonds add a satisfying crunch and nutty flavor. This dish is not only easy to make but also impressive enough to serve at gatherings or parties.
Making these treats is straightforward. You simply pit the dates, stuff them with almonds, and wrap each one in bacon before baking. The result is a finger food that’s sure to be a hit. The combination of textures and flavors makes every bite enjoyable, and they disappear quickly!
Ingredients
- 20 Medjool dates
- 20 almonds
- 10 slices of bacon, cut in half
- 1 tablespoon maple syrup (optional)
- 1/4 teaspoon black pepper (optional)
Instructions
- Preheat your oven to 400°F (200°C).
- Cut a small slit in each date and remove the pit. Stuff each date with an almond.
- Wrap each stuffed date with a half slice of bacon, securing it with a toothpick if needed.
- Place the wrapped dates on a baking sheet lined with parchment paper.
- Optional: Drizzle with maple syrup and sprinkle with black pepper for added flavor.
- Bake for 15-20 minutes, or until the bacon is crispy, turning halfway through for even cooking.
- Remove from the oven and let cool slightly before serving. Enjoy!
Sweet Potato Bites with Avocado

Sweet potato bites topped with creamy avocado are a delightful treat that’s both tasty and simple to make. The natural sweetness of roasted sweet potatoes pairs perfectly with the rich, buttery flavor of avocado. These bites are not only colorful but also nutritious, making them a hit at any gathering.
These appetizers can easily be prepared in a short time, which is great for busy hosts. The combination of textures and flavors makes each bite enjoyable. Plus, they are versatile; you can add your favorite spices or toppings to personalize them!
Ingredients
- 2 large sweet potatoes
- 2 ripe avocados
- 1 tablespoon lime juice
- 1/4 teaspoon garlic powder
- Salt and pepper, to taste
- 1/4 teaspoon paprika
- Fresh herbs (like cilantro or parsley) for garnish
Instructions
- Preheat the oven to 400°F (200°C).
- Wash and slice the sweet potatoes into 1/2-inch rounds. Lay them on a baking sheet lined with parchment paper.
- Drizzle with olive oil and season with salt and pepper. Roast for about 25 minutes, flipping halfway through, until tender.
- While the sweet potatoes are roasting, mash the avocados in a bowl. Mix in lime juice, garlic powder, salt, and pepper.
- Once the sweet potato rounds are cooked, remove them from the oven and let them cool slightly.
- Spoon the avocado mixture onto each sweet potato round. Sprinkle paprika and fresh herbs on top before serving.
Garlic Parmesan Popcorn

Garlic Parmesan popcorn is a delightful twist on the classic movie snack. This snack combines the buttery flavor of popcorn with a savory garlic kick and the rich taste of Parmesan cheese. It’s perfect for parties, movie nights, or just a cozy evening at home.
Making it is super easy and requires just a few ingredients. You can whip this up in no time, making it a go-to finger food for any gathering. Its crunchy texture and savory flavor are sure to be a hit among guests. So grab a bowl and enjoy this tasty snack!
Ingredients
- 1/2 cup popcorn kernels (about 120g)
- 3 tablespoons vegetable oil (about 45ml)
- 1/4 cup grated Parmesan cheese (about 25g)
- 2 tablespoons garlic powder (about 15g)
- 1 teaspoon salt (about 5g)
- 2 tablespoons melted butter (about 30ml)
Instructions
- Pop the Corn: In a large pot, heat the vegetable oil over medium heat. Add the popcorn kernels and cover the pot. Shake the pot occasionally until popping slows to about 2 seconds between pops.
- Season: Once popped, transfer the popcorn to a large bowl. Drizzle the melted butter over the popcorn and toss gently.
- Add Flavors: Sprinkle the garlic powder, grated Parmesan, and salt over the popcorn. Toss until evenly coated.
- Serve: Enjoy your Garlic Parmesan popcorn warm or at room temperature. Store leftovers in an airtight container for a few days if there are any!
More Like This
— SAVE THIS POST —
Did you like this post? If you liked this post, don’t hesitate to share it!
Want to save this post? You can pin the following images on pinterest to save this post.
We are Mary and Eric, the founders of Be Right Back, a blog dedicated to romance around the globe and at home.
We are Mary and Eric, the founders of Be Right Back, a blog dedicated to romance around the globe and at home. With over 10 years of experience in dating and traveling to romantic places, we share our favorite date ideas and romantic destinations to help couples level up their relationships. Having lived in and traveled through the USA, we also share our favourite things to do in the States.
With 70,000 monthly readers and 16,000 followers on social media, Be Right Back is your go-to resource for romantic trip ideas and couple activities at home and abroad.