Easy Sweet Potato Tortilla Recipe
If you love tortillas but want something a little different, this sweet potato tortilla is a game-changer. It’s cheesy, crispy, and surprisingly easy to make. Unlike regular flour tortillas, this one is made entirely from sweet potato slices, which means no kneading, no rolling, and no waiting for dough to rest. Just slice, assemble, bake, and you’re good to go.
I love this recipe because it’s simple but feels a little fancy. The cheese melts into the sweet potato, creating a tortilla that’s sturdy enough to hold all your favorite fillings while still being soft and slightly chewy. Plus, it’s naturally gluten-free and full of flavor. And if you’re like me and appreciate a good shortcut, using a mandolin or food processor to slice the sweet potatoes makes the whole process effortless.
You can fill these with whatever you like, but my go-to combination is cream cheese, salmon, avocado, corn, anchovies, and lettuce. It’s fresh, a little salty, and pairs perfectly with the slightly caramelized edges of the sweet potato. But honestly, the tortilla itself is so good that even a simple cheese and ham filling works just fine.
Tips for Making the Best Sweet Potato Tortilla
- Slice the sweet potatoes thinly and evenly – A mandolin is your best bet here. If the slices are too thick, the tortilla won’t hold together well, and it’ll take longer to bake. If they’re too thin, they’ll crisp up too much and lose flexibility.
- Use cheese as the glue – The cheese is what holds the tortilla together, so don’t be stingy with it. A good layer between the sweet potato slices and a generous amount on top will help everything meld into one cohesive piece.
- Oil the parchment paper – A little oil (or butter) under the tortilla will prevent sticking and help create those crispy edges. You don’t need much, but don’t skip this step.
- Keep an eye on the oven – Every oven is different, and sweet potatoes can go from perfectly baked to overly crisp pretty fast. Check around the 15-minute mark and adjust as needed.
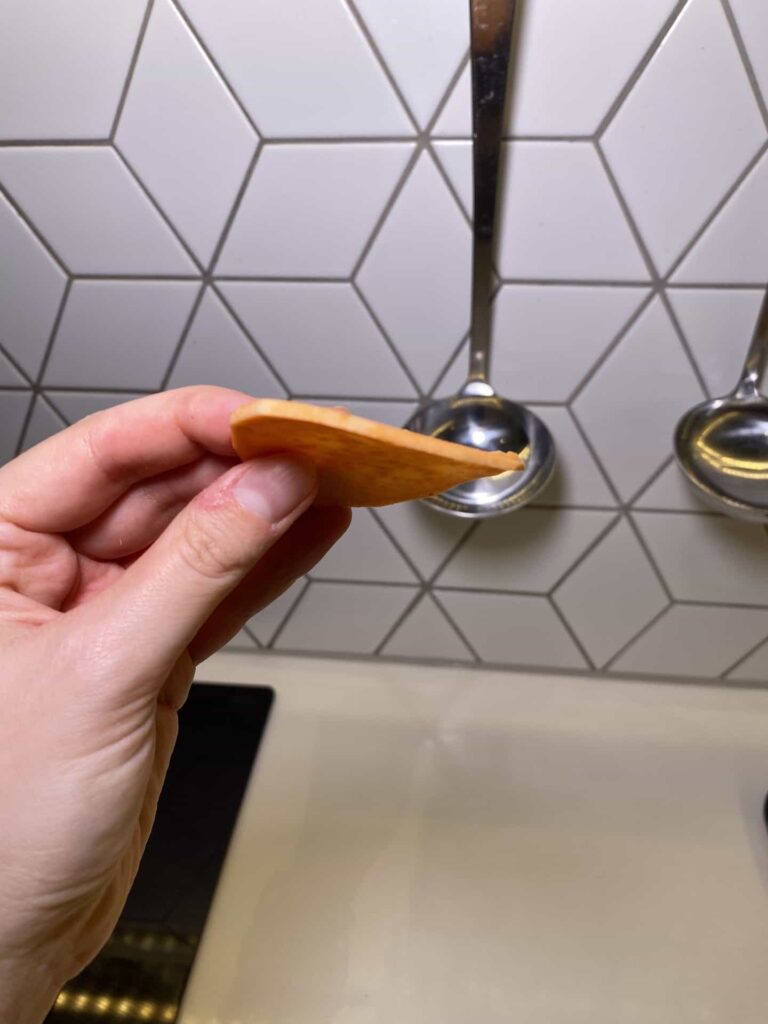
- Let it cool slightly before filling – The tortilla will be more fragile when it first comes out of the oven. Letting it sit for a couple of minutes makes it easier to handle.
Ingredients (For 2 Tortillas)
- 4 small sweet potatoes or 2 large ones (if you get the wonky ones from Morrisons, you’ll need 4)
- 100g grated cheese (about 1 cup)
- 1 teaspoon oil or butter
Alternative Ingredients
- Different cheeses – While a melty cheese like cheddar or mozzarella works best, you can experiment with parmesan for extra crispiness or a mix of cheeses for different flavors.
- Other vegetables – You can add thinly sliced zucchini or carrot alongside the sweet potatoes for extra texture. Just make sure they’re sliced very thin.
- Dairy-free option – Use a plant-based cheese that melts well, like a vegan mozzarella or cheddar.
- Extra seasoning – A sprinkle of paprika, garlic powder, or even a little chili powder on the sweet potatoes can add more depth to the flavor.
Step 1: Slice the Sweet Potatoes

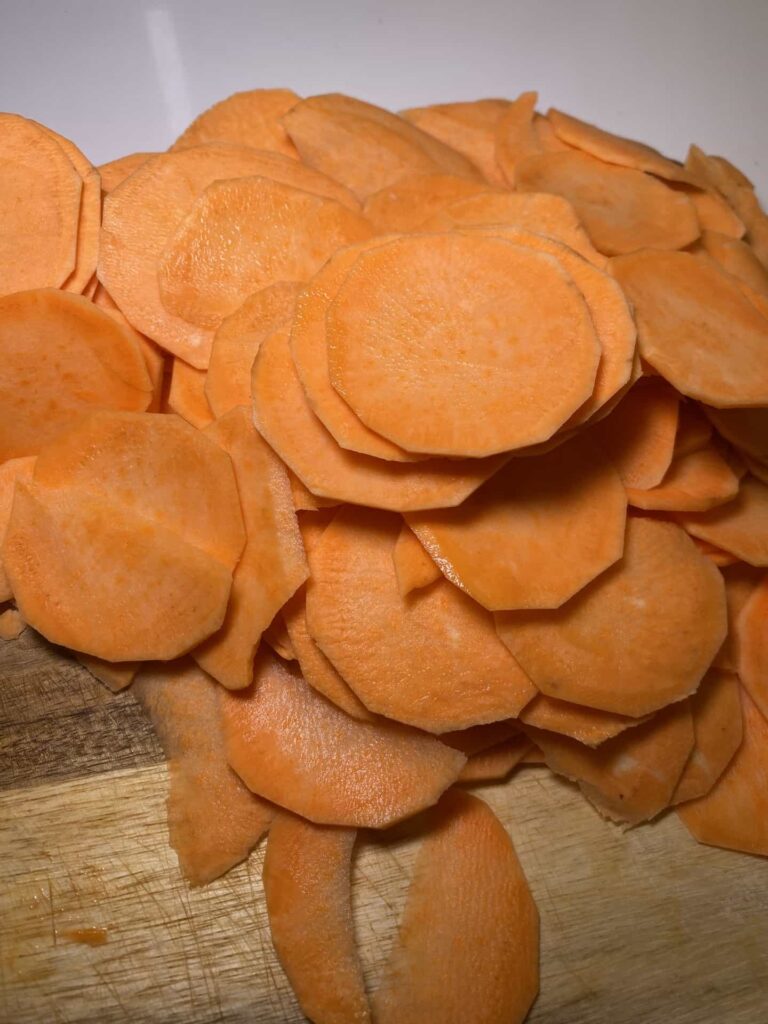
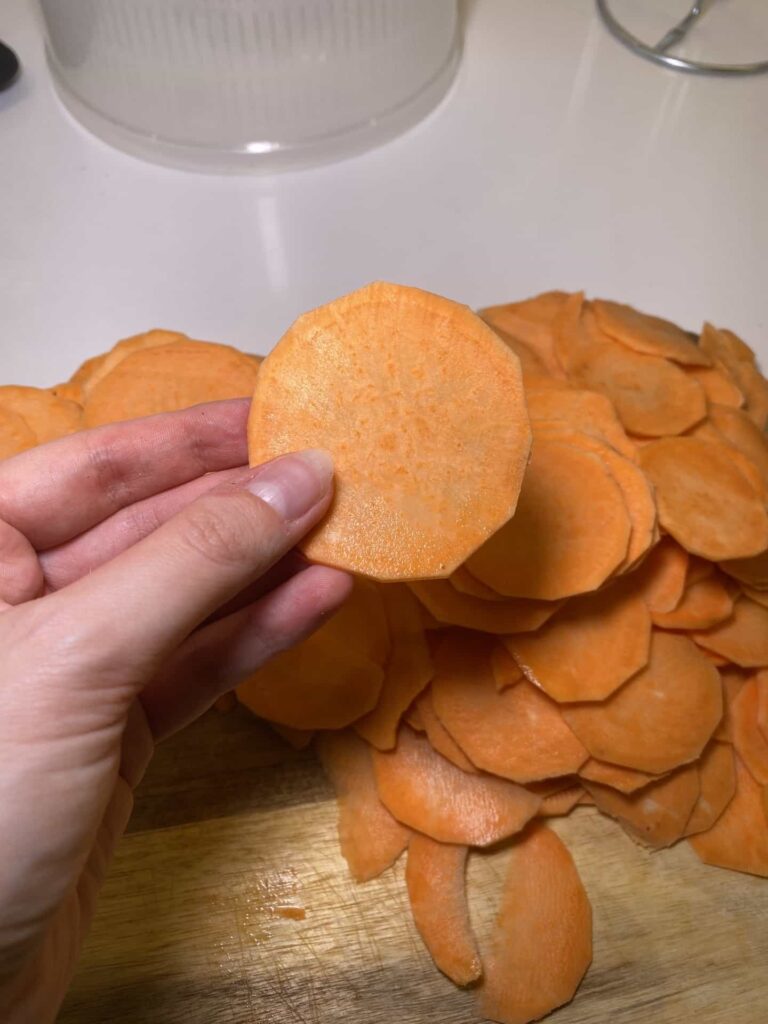
Use a mandolin or food processor to slice the sweet potatoes into thin, even pieces. If you’re cutting by hand, try to keep them as uniform as possible, but a mandolin is the best way to get consistent thickness. Thin slices will ensure the tortilla holds together properly and bakes evenly.
Step 2: Prep the Baking Sheet
Line a baking sheet with parchment paper. Lightly oil the parchment or spread a thin layer of butter to prevent sticking. This will also help crisp up the edges of the tortilla.
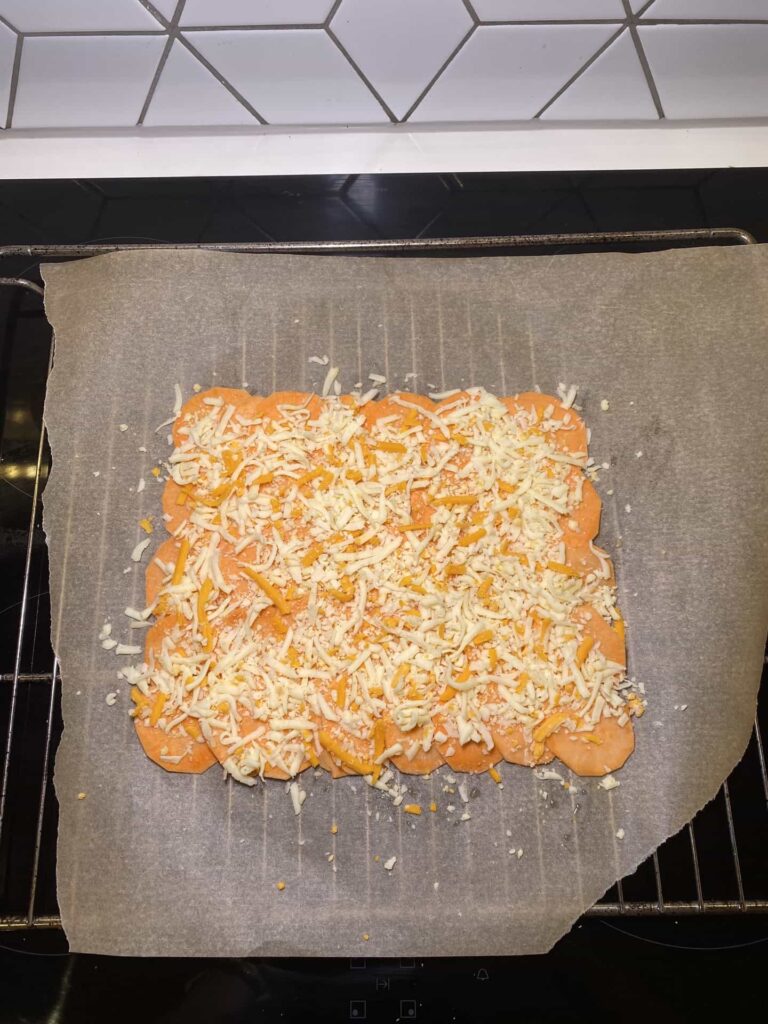
Step 3: Assemble the Tortilla
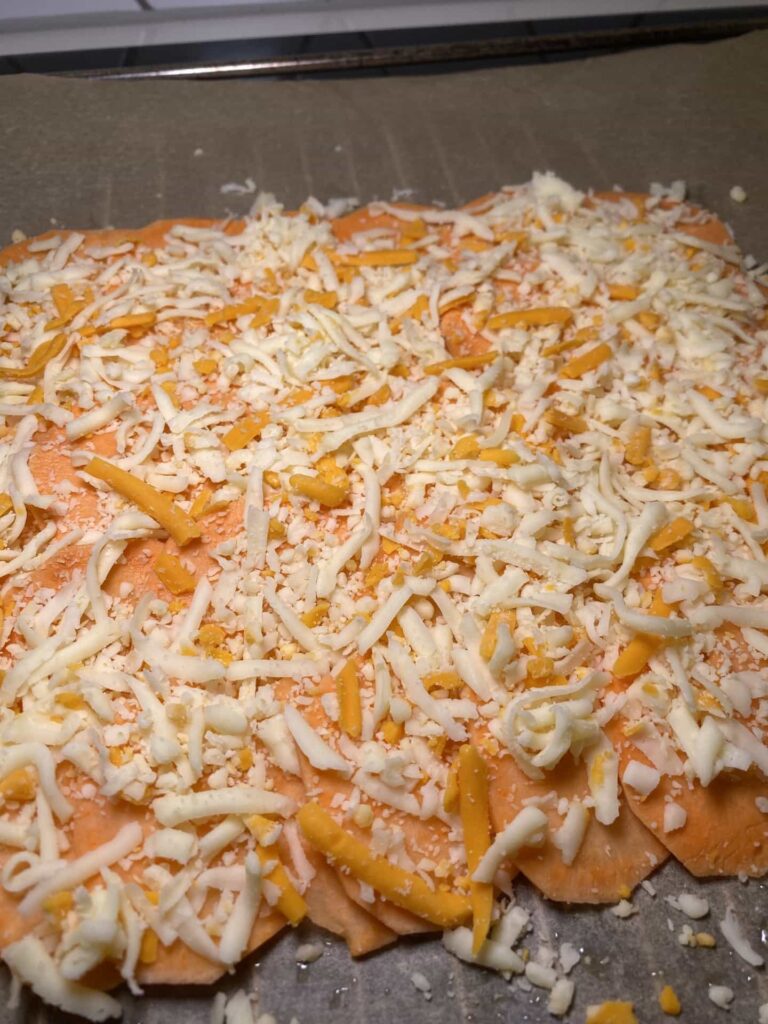

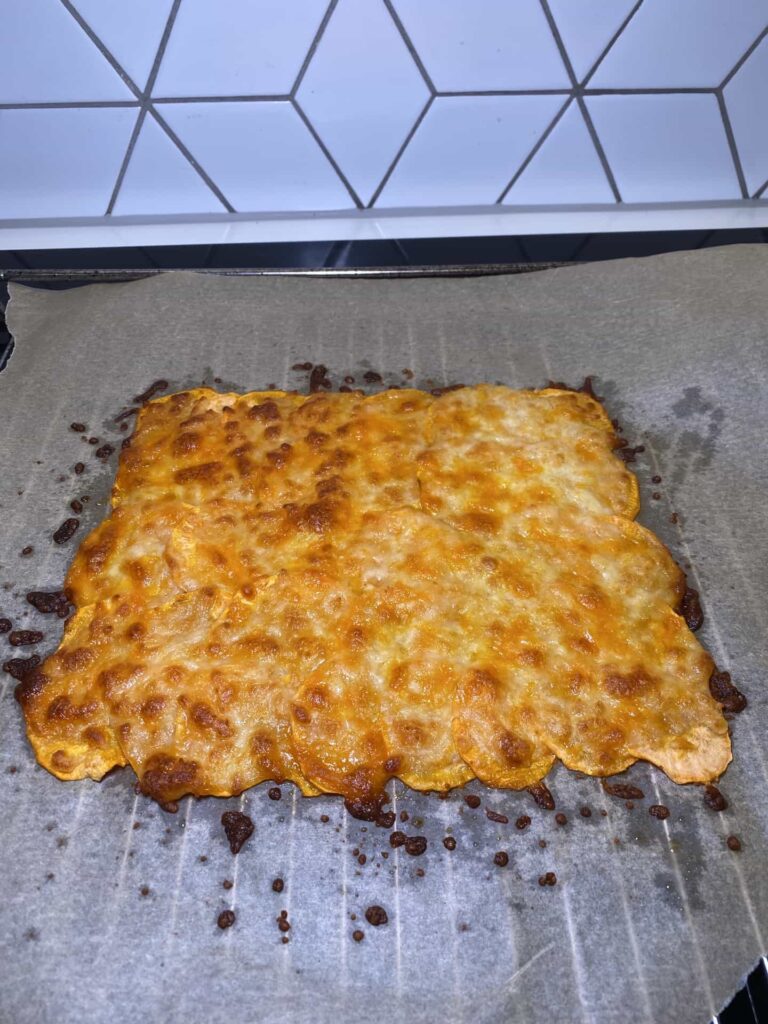
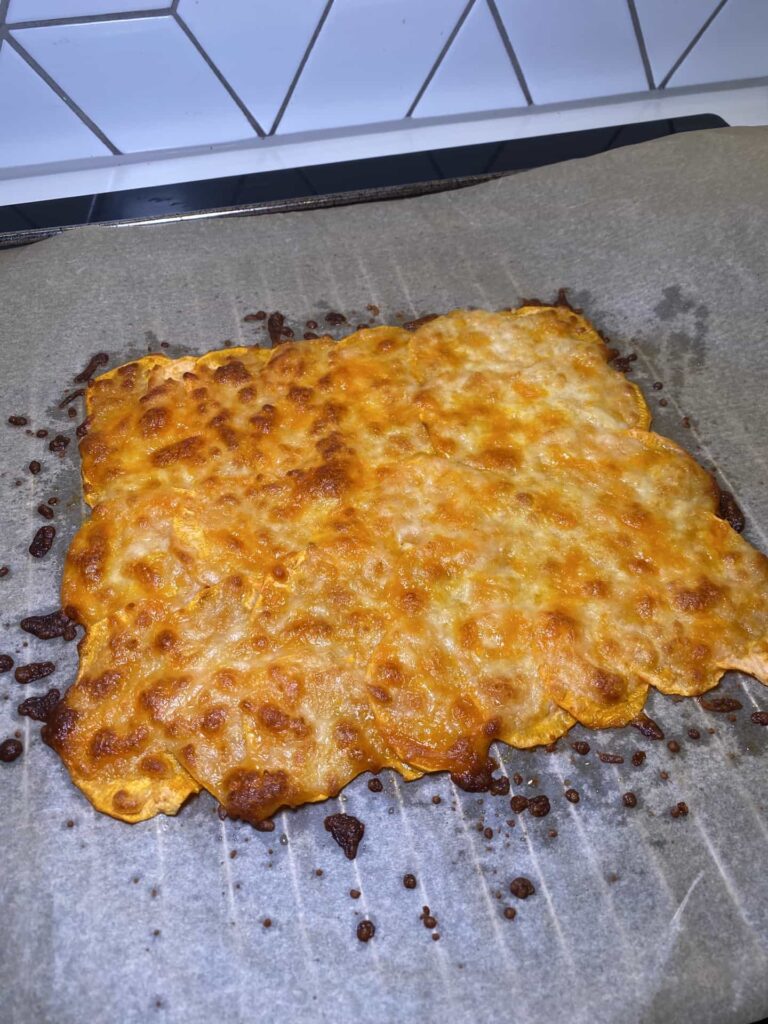
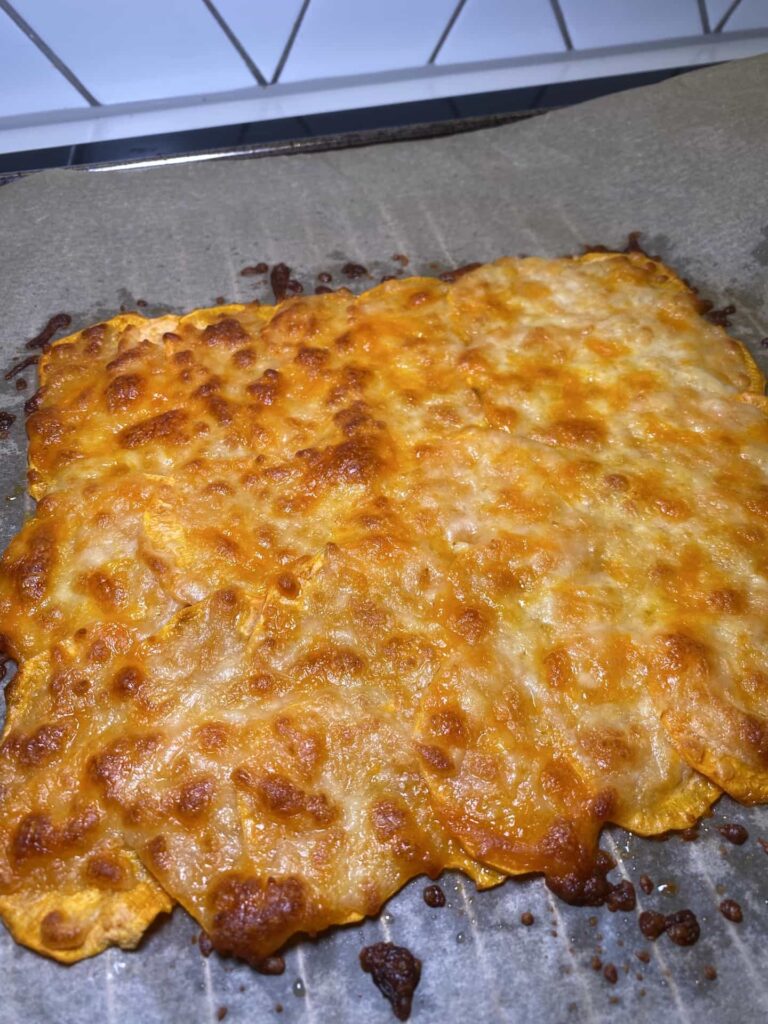
Sprinkle a small amount of grated cheese on the oiled parchment paper. This helps create a base layer that holds everything together. Then, lay out the sweet potato slices, slightly overlapping them in a circular or rectangular shape, depending on how you want your tortilla to look. Once your base is covered, pile on the rest of the cheese. The cheese needs to fully cover the top to act as the binding agent.
Step 4: Bake the Tortilla
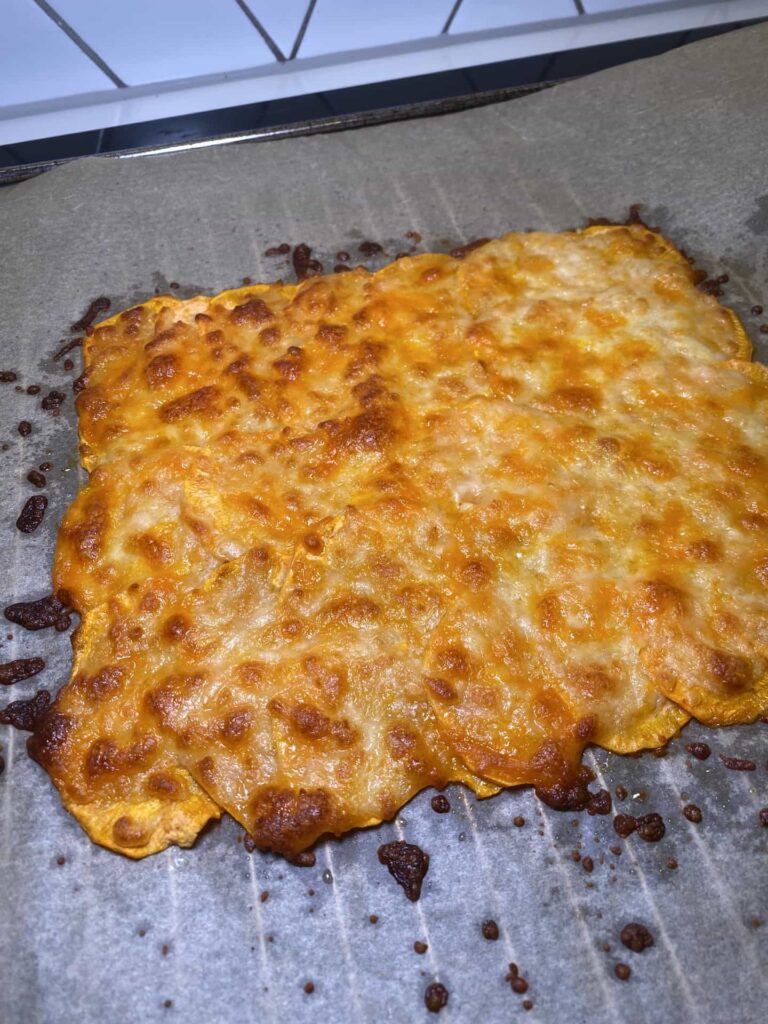

Place the baking sheet in the oven at 180°C (350°F) and bake for about 20 minutes. Keep an eye on it after 15 minutes to make sure it doesn’t overcook. The cheese should be fully melted, and the sweet potatoes should be tender but still holding their shape.
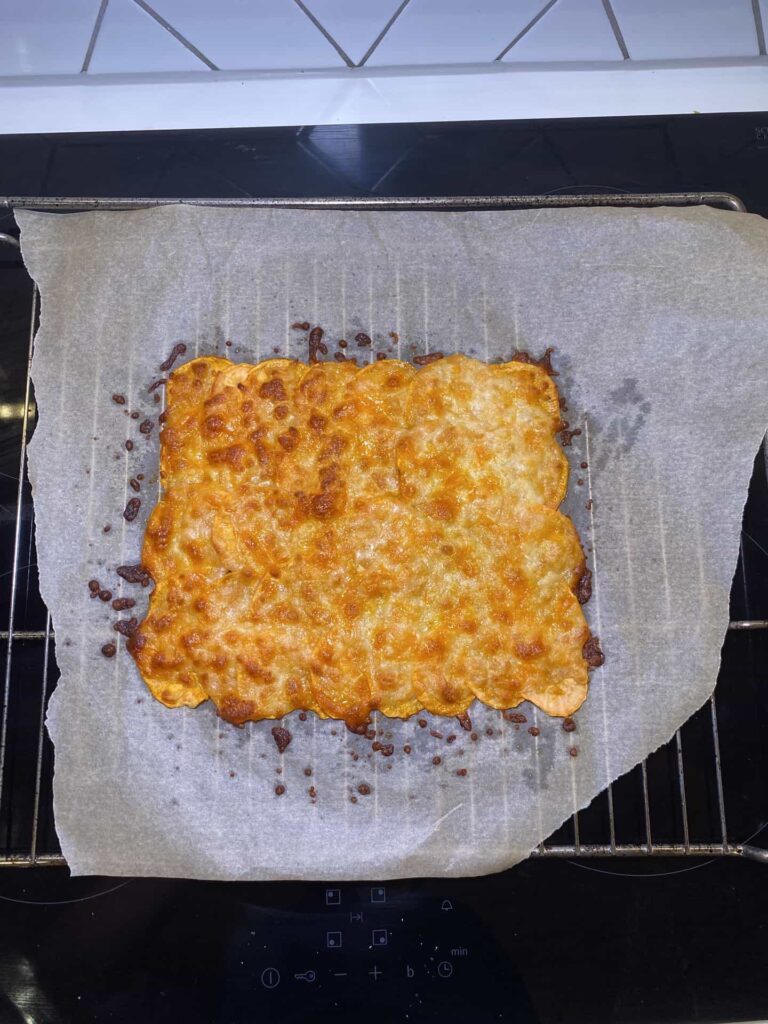
Step 5: Cool and Fill
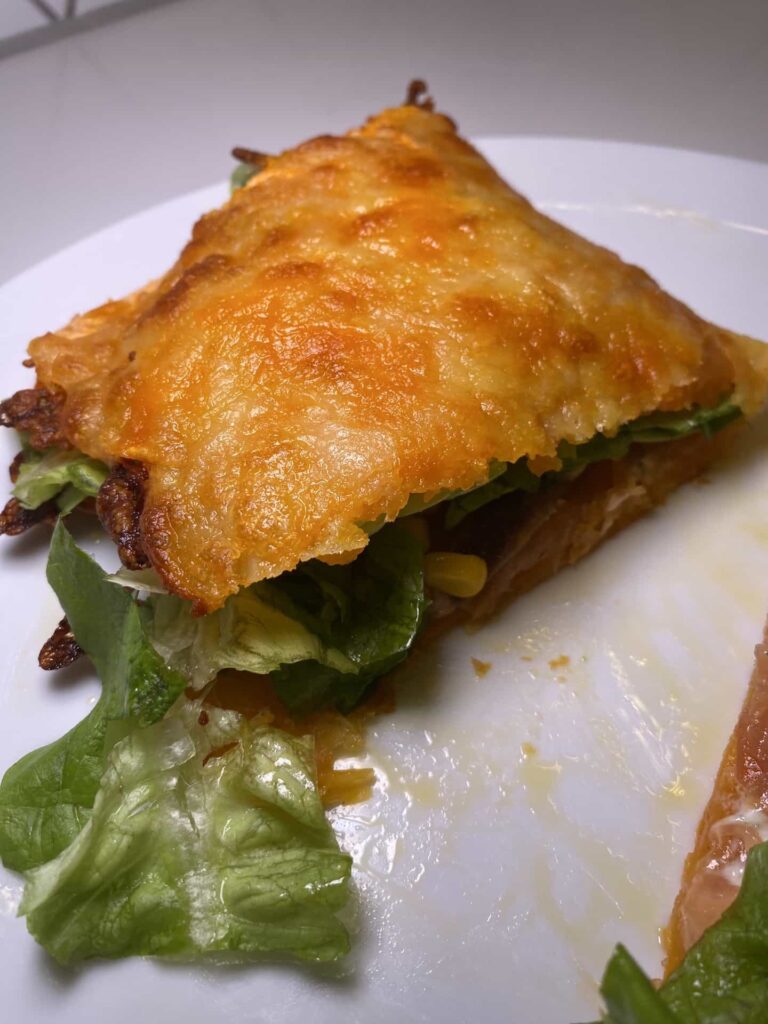
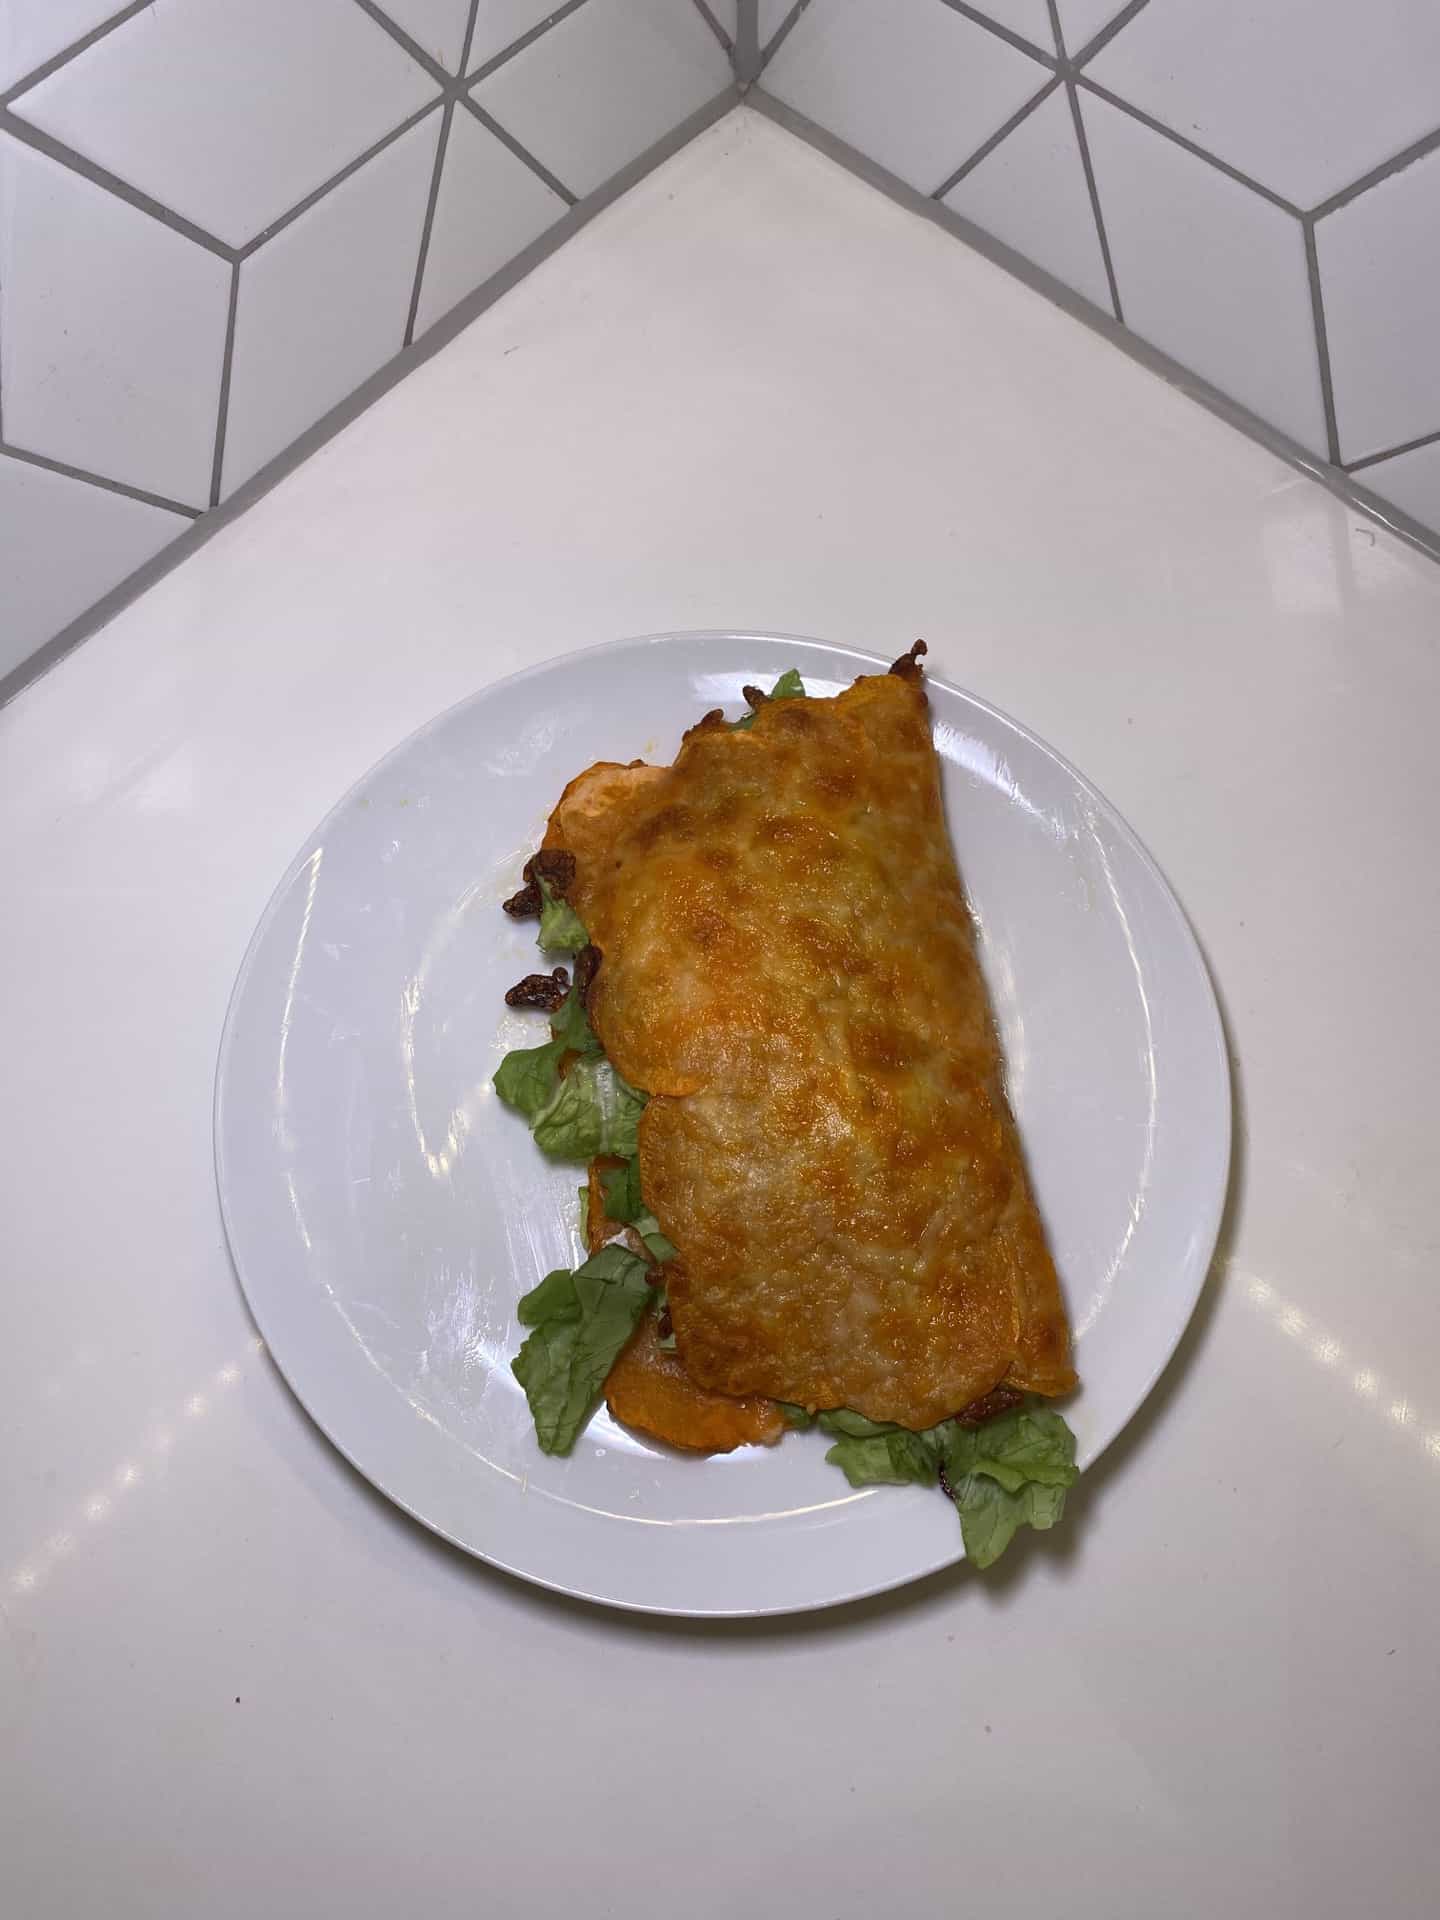
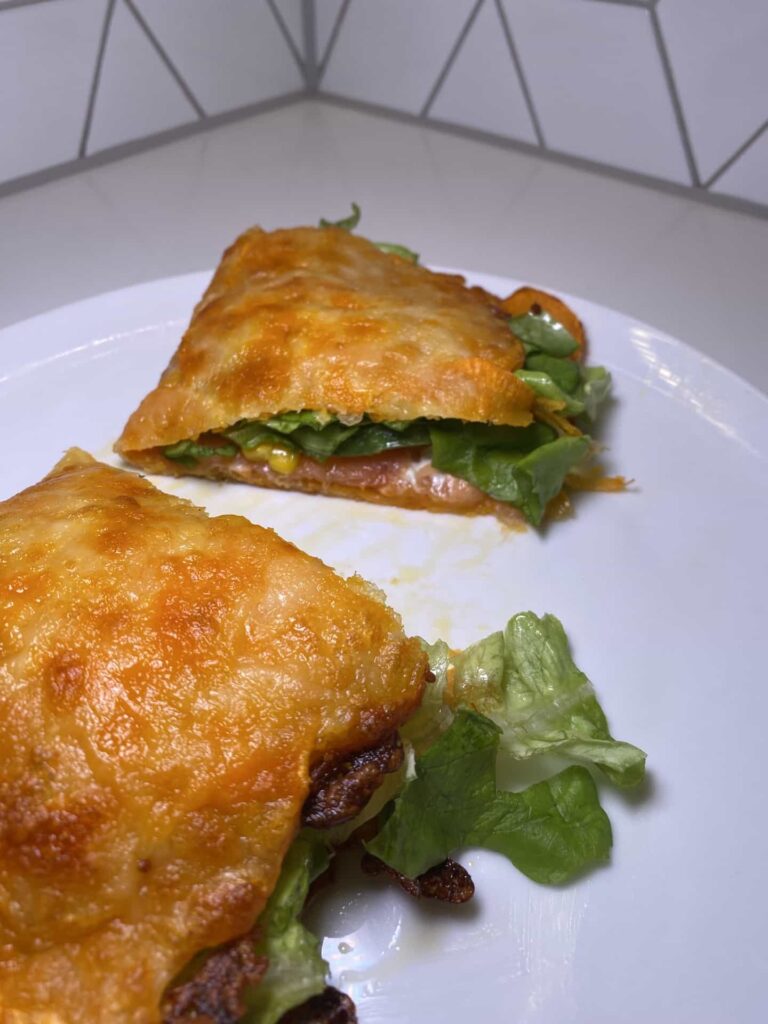
Once out of the oven, let the tortilla sit for a couple of minutes to firm up. Then, add your favorite fillings. I like to spread cream cheese over mine and layer it with salmon, avocado, corn, anchovies, and lettuce. But you can go for anything—chicken, roasted veggies, or even scrambled eggs work great.
Step 6: Fold and Serve
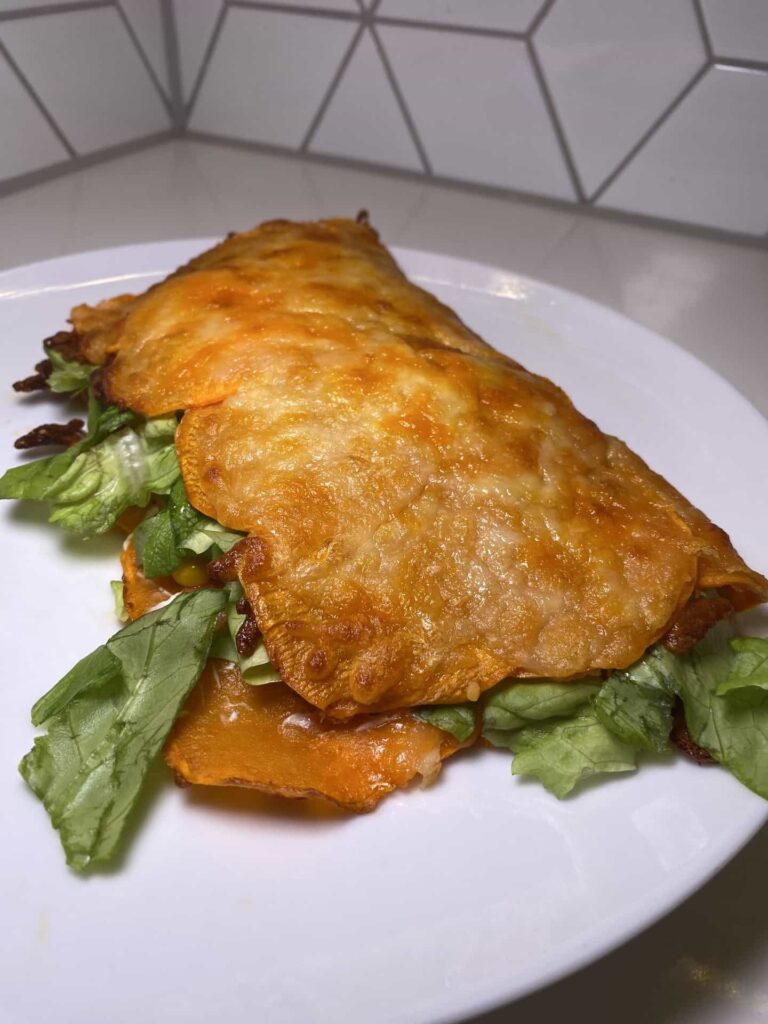
Carefully fold the tortilla in half like a taco or roll it up if it’s flexible enough. Serve immediately while the cheese is still warm and melty. If you’re making extra, you can store them in the fridge and reheat in the oven or on a skillet to crisp them back up.
Once your tortilla is baked and slightly cooled, it’s time to fill it with whatever you like. Here’s how I made mine:
- Spread a generous layer of cream cheese over the tortilla. This adds a creamy base that pairs perfectly with the sweet potato.
- Add slices of salmon, chunks of avocado, a handful of corn, a few anchovies, and some fresh lettuce. The mix of flavors—salty, creamy, and fresh—works so well together.
- Carefully fold the tortilla in half, pressing gently to keep everything in place.
- That’s it—it’s ready to eat! Enjoy it as is, or slice it in half for easier handling.
— SAVE THIS POST —
Did you like this post? If you liked this post, don’t hesitate to share it!
Want to save this post? You can pin the following images on pinterest to save this post.
We are Mary and Eric, the founders of Be Right Back, a blog dedicated to romance around the globe and at home.
We are Mary and Eric, the founders of Be Right Back, a blog dedicated to romance around the globe and at home. With over 10 years of experience in dating and traveling to romantic places, we share our favorite date ideas and romantic destinations to help couples level up their relationships. Having lived in and traveled through the USA, we also share our favourite things to do in the States.
With 70,000 monthly readers and 16,000 followers on social media, Be Right Back is your go-to resource for romantic trip ideas and couple activities at home and abroad.