How To Make A Chic Pearl Christmas Tree Decoration
I absolutely love decorating for Christmas, and making my own decorations adds a special touch to the holiday season. Creating a DIY chic pearl Christmas tree is one of my favorite projects because it’s simple, elegant, and adds a sophisticated feel to any space. Plus, it only takes about an hour to make! You can customize it to fit your home decor perfectly, whether you prefer classic white pearls or something more colorful and festive.
One of the best things about making your own Christmas decorations is the ability to choose the materials that match your style. By selecting the right pearls, you can ensure your tree complements your holiday theme beautifully. This flexibility means you can create a cohesive look throughout your home, no matter your aesthetic.
Christmas is my favorite time of year because it gives me a chance to get crafty and fill my home with festive cheer. Making these chic pearl Christmas trees not only adds a touch of holiday magic but also makes my home feel warm and inviting.
These decorations are fun to make with your boyfriend or spouse, making it a perfect holiday date idea. You can spend quality time together, get creative, and enjoy the satisfaction of making something beautiful for your home. It’s a lovely way to bond and create lasting memories while also crafting practical and charming decor.
So, if you’re looking for a fun, easy, and enjoyable Christmas craft, give these DIY chic pearl Christmas trees a try. They’ll add a special touch to your home, making it feel cozier and more festive. Plus, it’s a fantastic way to spend time with your loved ones and create something together.
Where to Set Your Chic Pearl Christmas Tree
- On a Shelf in Your Living Room: Perfect for adding a touch of elegance to your living space.
- At the Foot of Your Christmas Tree: Complements your main tree with a smaller, chic version.
- In Your Entryway: Welcomes guests with a stylish holiday touch.
- As a Centerpiece on Your Living Room Table: Makes a beautiful and unique focal point.
- In Your Bedroom: Brings the Christmas atmosphere to your personal space.
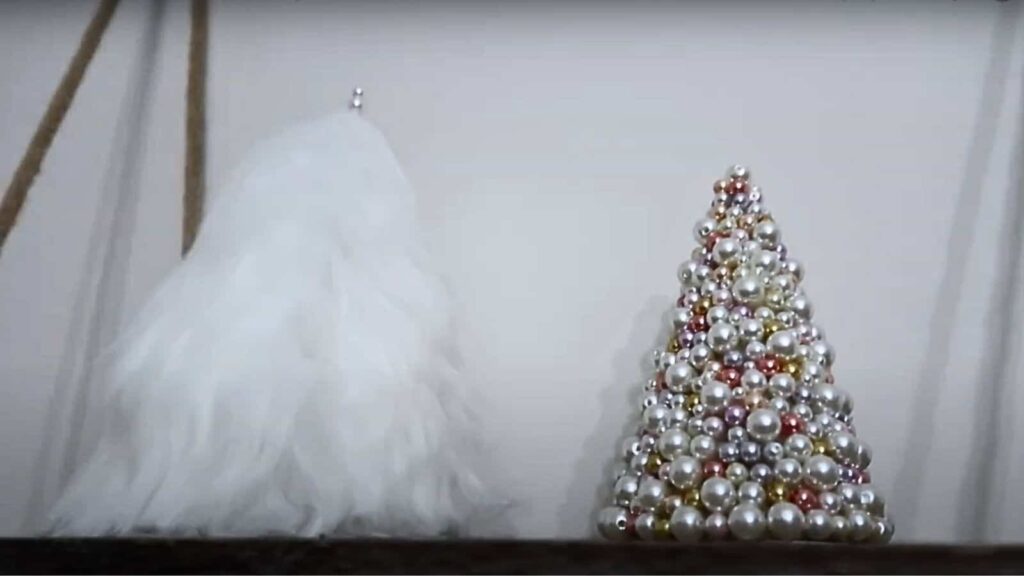
- With Your Fluffy Christmas Tree on a Shelf: Pairs wonderfully with other handmade decorations. Check out our fluffy Christmas tree DIY here.
What You Need
- A bag of pearls in the color of your choice
- Glue (hot glue works best, but super glue can work too)
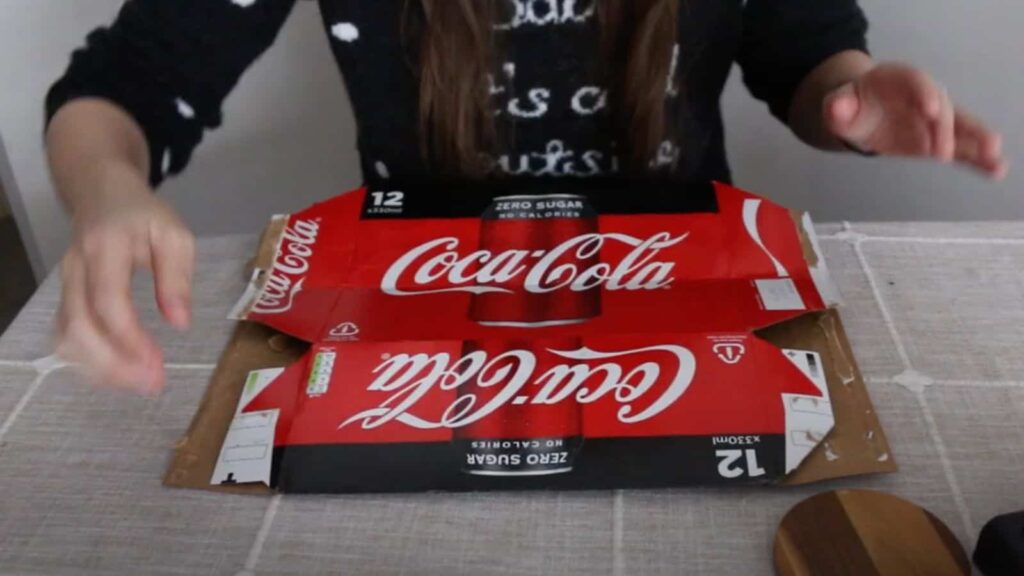
- Cardboard (such as the cardboard from soda drink packs)
- A pencil
What to Know
- Very Easy: This project is simple and fun.
- Takes About One Hour: A relaxing craft for a chic Christmas touch.
What to Do
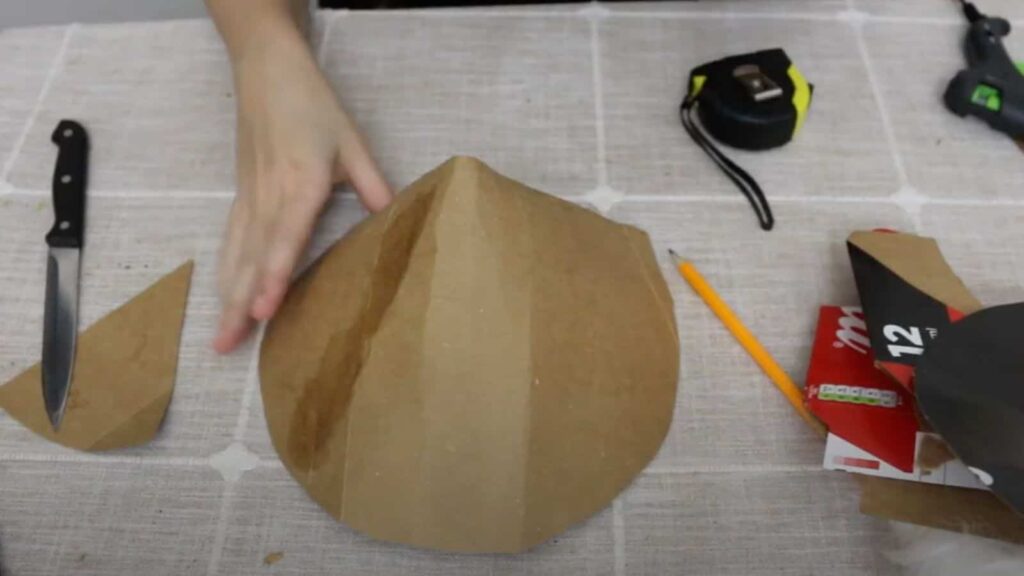
Step 1: Make the Cardboard Cone
Take the cardboard and trace a half-circle of your desired size. Cut it out carefully. It’s better to go bigger because you can always trim it later if needed.
Step 2: Create the Cone Shape
Once cut out, fold the half-circle to create a cone shape. Adjust until you have the shape you like, then glue the edges together. Ensure both ends of the circle overlap slightly and glue that part as well for extra sturdiness.
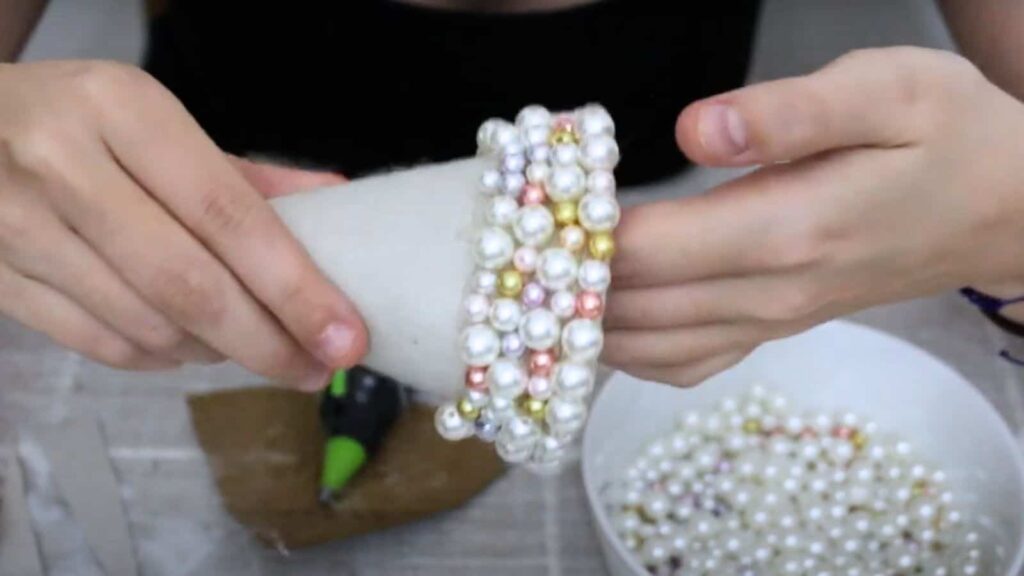
Step 3: Add the Pearls
Glue the pearls onto the cardboard cone. Start with larger pearls at the bottom and gradually use smaller ones as you move towards the top. This creates a balanced and visually appealing tree. Use small pearls to fill in any gaps, ensuring no cardboard is visible.

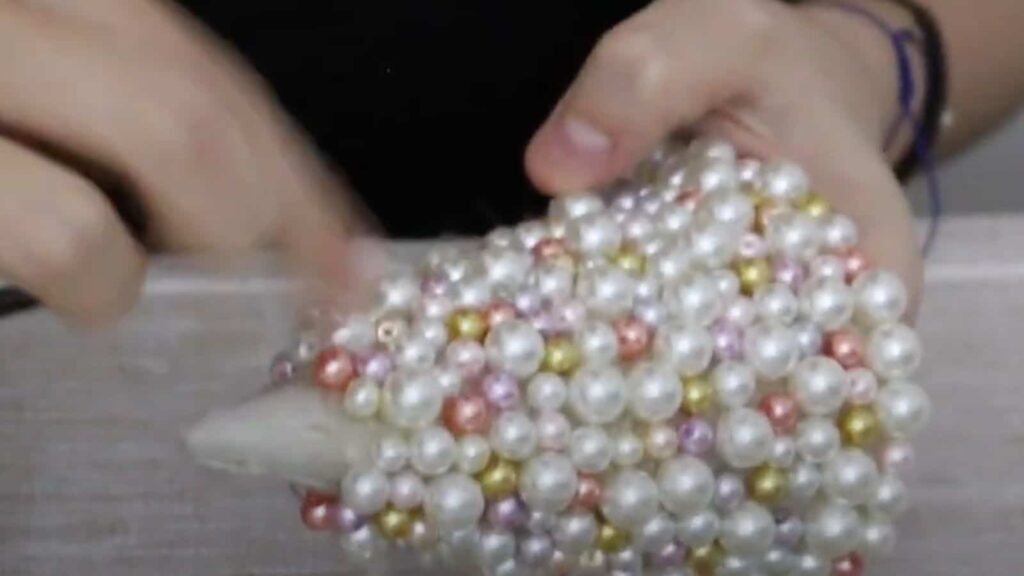
Step 4: Add Finishing Touches
Take a couple of pearls and glue them at the top for an extra touch. This adds an elegant finish to your chic Christmas tree.
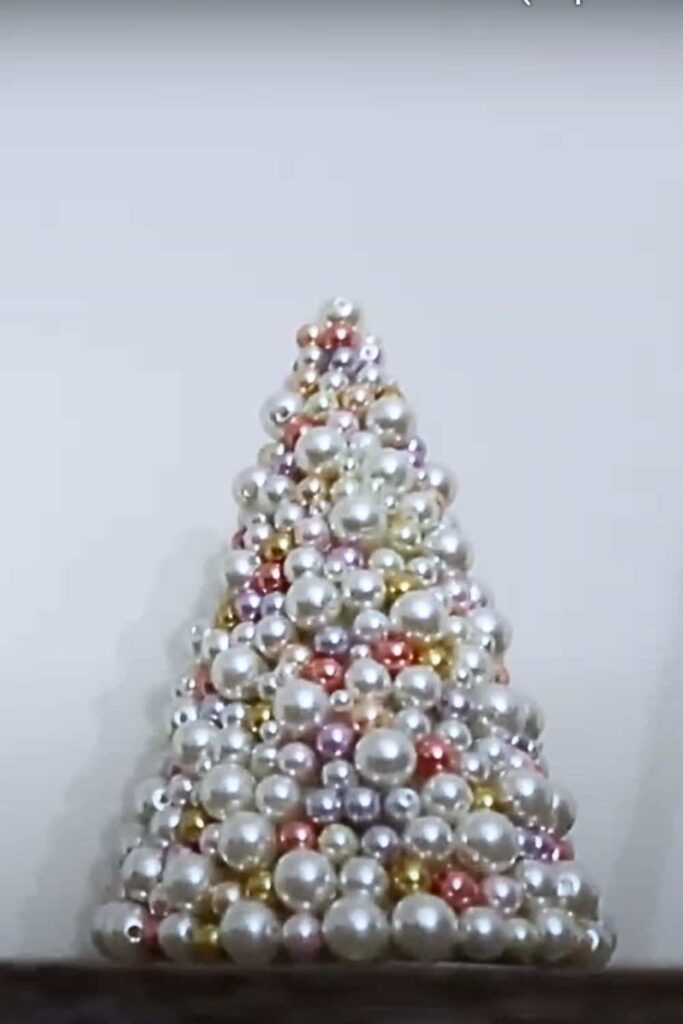
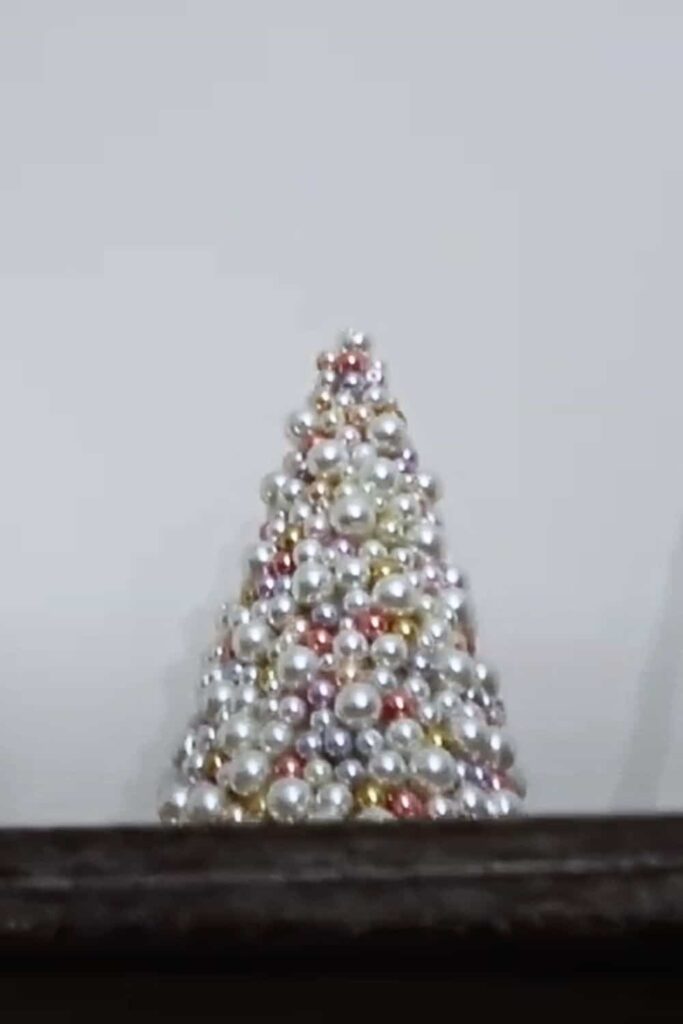
And tadaa! Your chic pearl Christmas tree decoration is ready to grace your home.
More Like This
- 25 Creative Living Room Graduation Party Ideas for a Memorable Celebration
- 25 Creative At-Home Graduation Party Ideas for a Memorable Celebration
- 25 Creative Garage Graduation Party Ideas You’ll Love
- 25 Creative Graduation Party Table Ideas You’ll Love
- 20 Stunning Floral Graduation Party Ideas for a Memorable Celebration
— SAVE THIS POST —
Did you like this post? If you liked this post, don’t hesitate to share it!
Want to save this post? You can pin the following images on pinterest to save this post.
We are Mary and Eric, the founders of Be Right Back, a blog dedicated to romance around the globe and at home.
We are Mary and Eric, the founders of Be Right Back, a blog dedicated to romance around the globe and at home. With over 10 years of experience in dating and traveling to romantic places, we share our favorite date ideas and romantic destinations to help couples level up their relationships. Having lived in and traveled through the USA, we also share our favourite things to do in the States.
With 70,000 monthly readers and 16,000 followers on social media, Be Right Back is your go-to resource for romantic trip ideas and couple activities at home and abroad.