Shrimp Sushi Cones
Shrimp cones might just be my favorite lazy sushi hack. They take about 15 minutes to throw together, but they look like you really tried. And honestly, they taste just as good as something you’d order at a fancy sushi place.
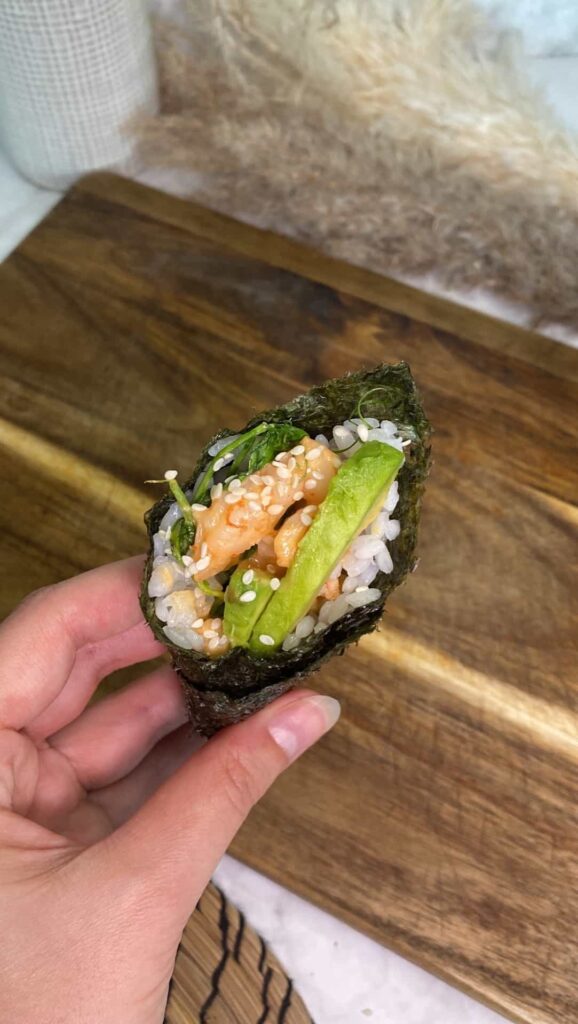
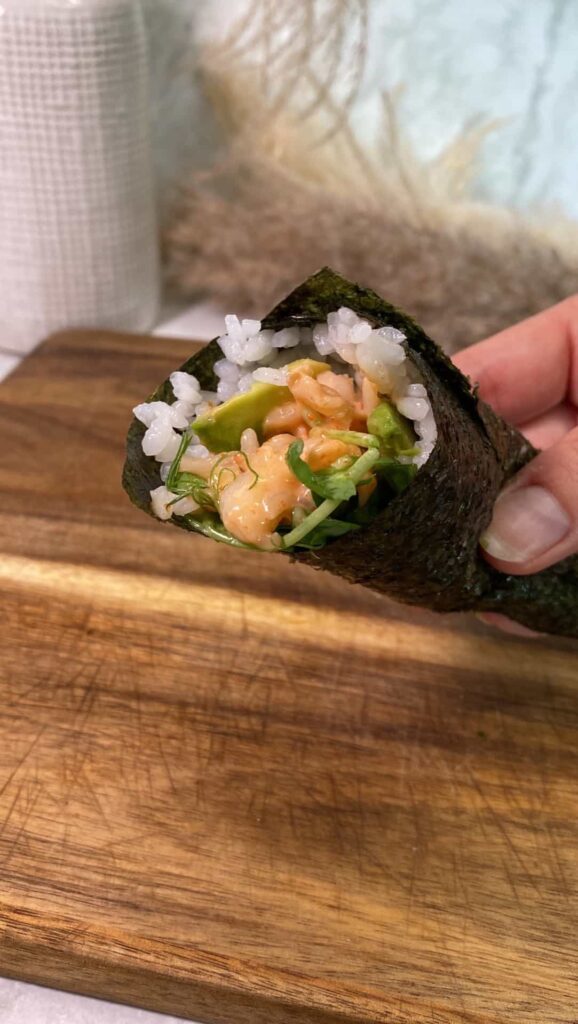
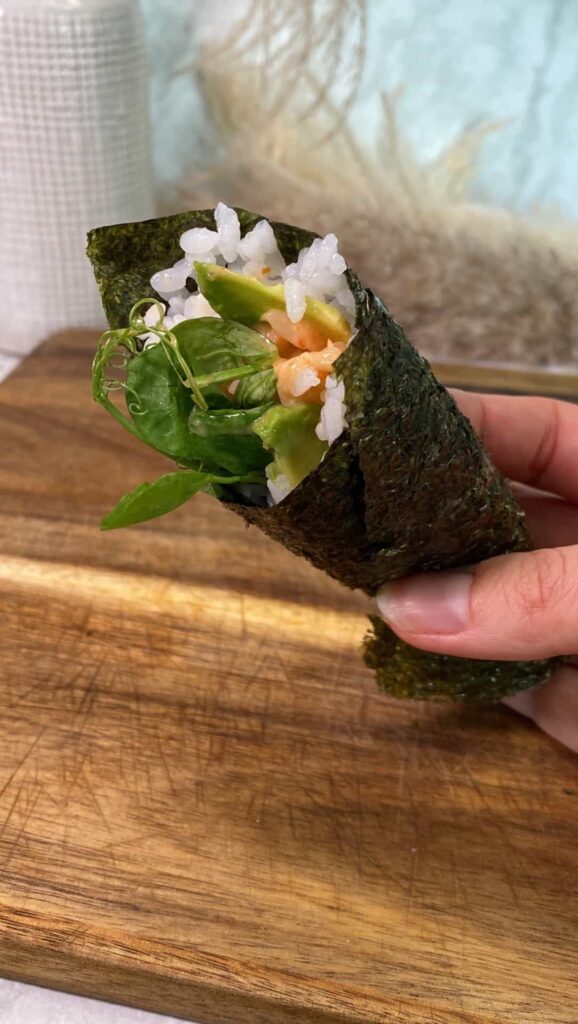
The spicy shrimp with creamy siracha mayo, soft sushi rice, buttery avocado, and that little bit of crunch from the pea shoots? It’s everything I want in a bite. Wrapped up in crispy seaweed like a little handheld cone, they’re fun to eat and perfect for warm-weather dinners, date nights at home, or even a quick lunch that doesn’t feel boring.
What I love most is how flexible these are. You can swap in other proteins, use leftover rice, and even make a veggie-only version. Once you get the hang of rolling them, it’s easy. And if your cones end up a little messy? Who cares. They still taste amazing.
Here are a few tips to make your shrimp cones easy and delicious:
- Don’t overcook the shrimp. Since you’re chopping them small, you just want them pink and opaque—2–3 minutes max if they’re raw.
- Use short-grain sushi rice or another sticky rice so it holds together. Regular long-grain rice won’t work here.
- When spreading the rice onto the seaweed, wet your fingers slightly to keep it from sticking all over your hands.
- Rolling the cones doesn’t have to be perfect. Just angle the seaweed and wrap tightly around the filling, like a mini ice cream cone.
Ingredients
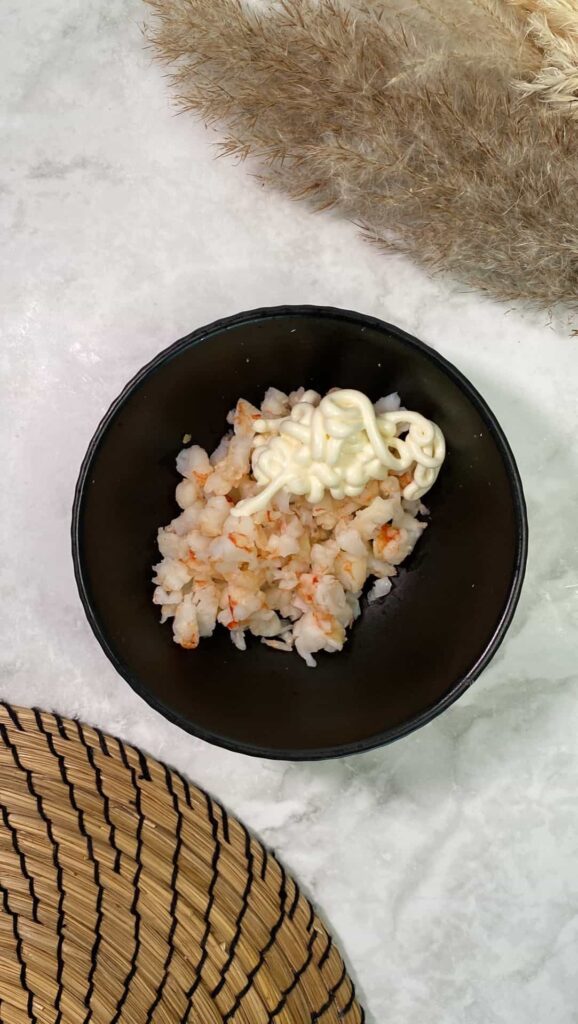
- 100g cooked shrimp, chopped finely (about 3.5 oz)
- 1–2 tablespoons mayonnaise
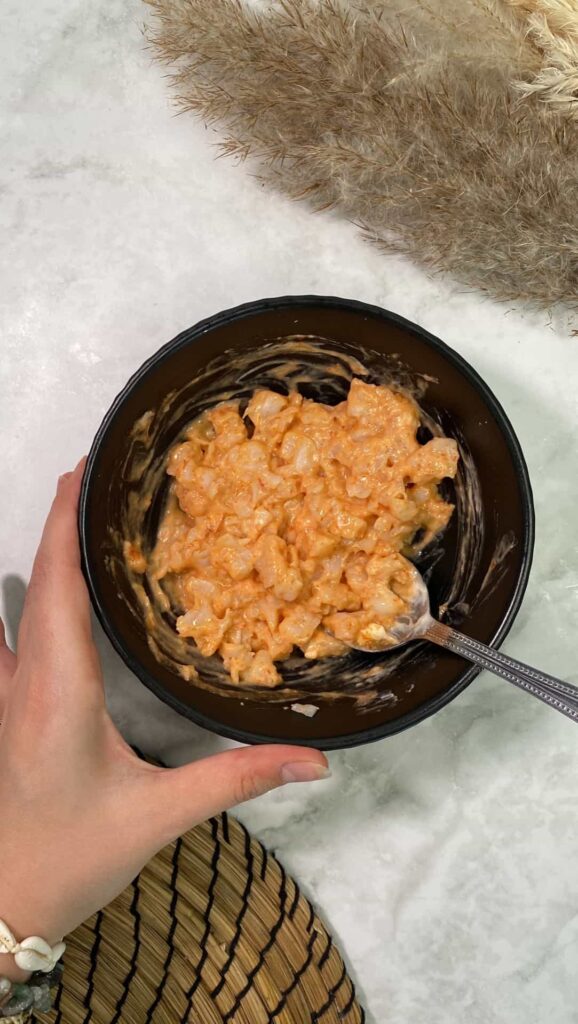
- 1–2 teaspoons siracha (adjust to taste)
- 1 avocado, sliced
- 1 cup cooked sushi rice (about 180g)
- 4–6 pea shoot sprigs
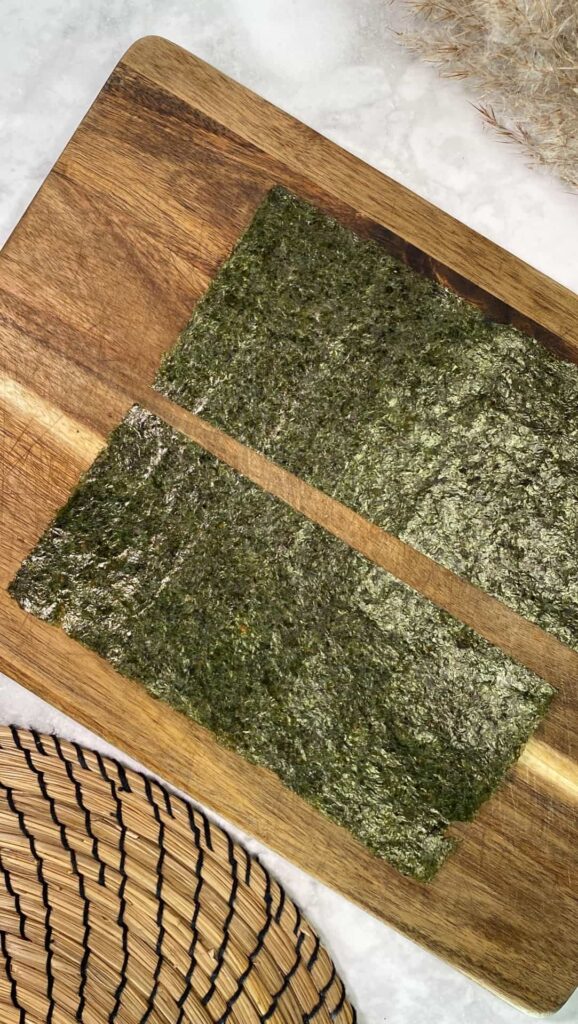
- 2 sheets of seaweed (nori), each cut in half
- sesame seeds
Alternative Ingredients
If you’re not into shrimp, try canned tuna or cooked salmon instead. Both go great with spicy mayo.
No siracha? Use your favorite hot sauce or even a pinch of chili flakes mixed with mayo.
For a plant-based version, swap the shrimp for mashed chickpeas or tofu cubes and use vegan mayo.
Not a fan of pea shoots? Try shredded lettuce, cucumber sticks, or even pickled carrots for crunch.
Step 1: Cook the Sushi Rice
Rinse 1 cup of sushi rice until the water runs mostly clear, then cook according to package instructions. Let it cool slightly so it’s warm but not steaming hot—it’ll be easier to handle.
Step 2: Cook and Prep the Shrimp
If your shrimp aren’t pre-cooked, boil or pan-cook them until pink and opaque (about 2–3 minutes). Once cooled, chop them finely.
In a small bowl, mix the shrimp with mayo and siracha until evenly coated. You can adjust the spice level based on how much heat you want.
Step 3: Prep the Seaweed and Avocado
Cut your seaweed sheets in half to make two long strips (like a rectangle).
Slice your avocado thinly and get your pea shoots ready.
Step 4: Assemble the Cones
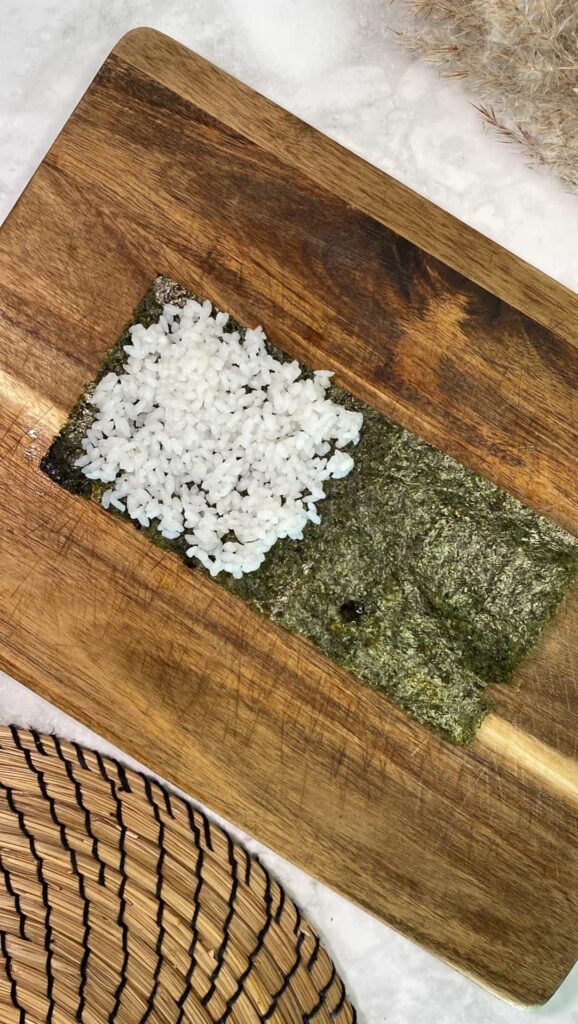
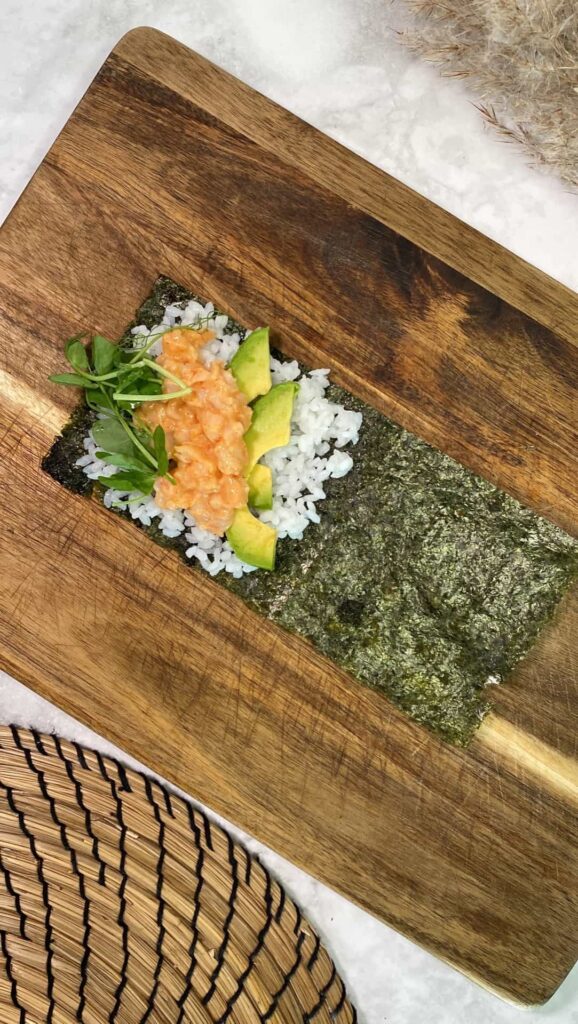
Take one half-sheet of seaweed. On the left side, press a spoonful of sushi rice into a small triangle shape, covering about a third of the seaweed. Use wet fingers to help spread the rice.
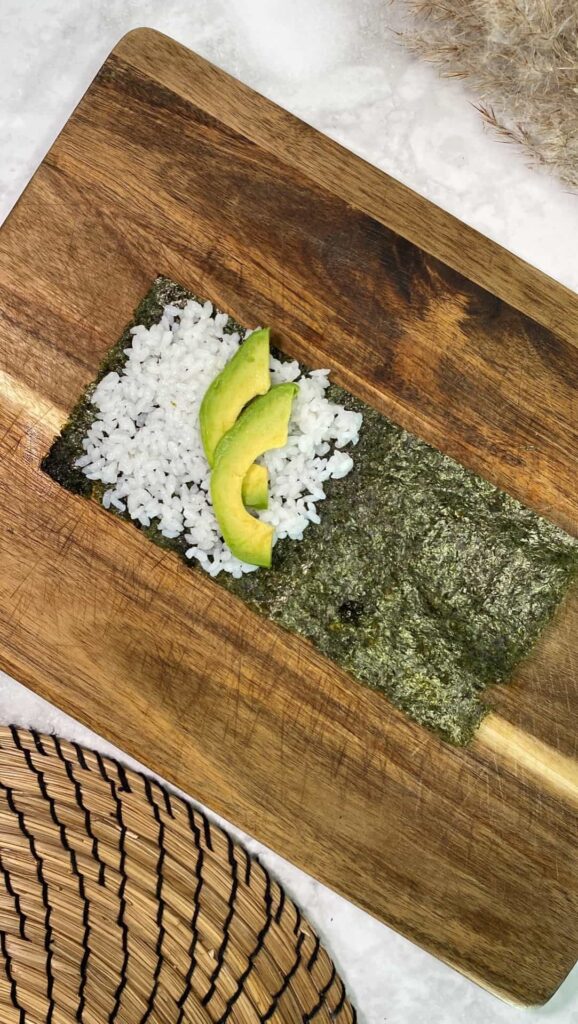
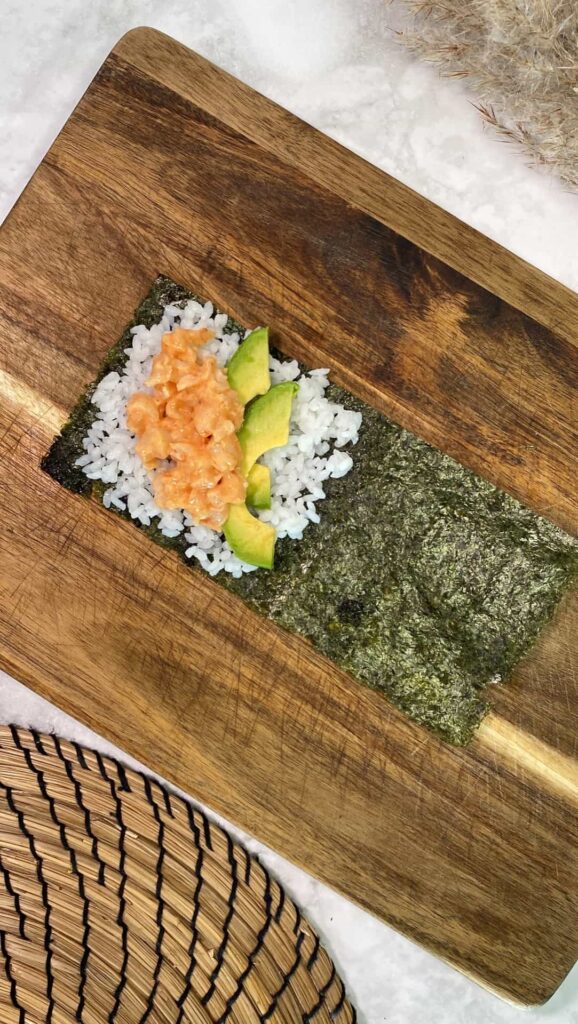
Top with a few slices of avocado, a spoonful of your spicy shrimp mix, and a few pea shoots.
Now roll from the bottom left corner diagonally toward the upper edge, forming a cone shape. Press to seal. If the seaweed isn’t sticking, you can dab a little water at the edge to help it seal. Sprinkle some sesame seeds to finish.
Repeat with the rest.

How to Conserve the Recipe
These shrimp cones are best eaten fresh. The seaweed starts to soften quickly once the rice hits it, and the texture’s just not the same after an hour or two.
If you want to prep ahead, keep the rice, shrimp mixture, and other fillings in separate containers in the fridge. Assemble just before serving for that perfect crunch.
Leftover shrimp mix can be stored in the fridge for up to 2 days. Just don’t mix it into warm rice—it can change the texture.

Ways to Serve These Shrimp Cones
These cones work for so many occasions:
Light lunch: Just two or three of these with a miso soup or simple salad makes a fresh, satisfying lunch.
Appetizer: Serve a tray of cones at your next gathering. They’re easy to hold and bite-sized enough for parties.
Date night: They look fun on a platter and you can prep them together in the kitchen. Honestly, it’s more fun than takeout sushi.
Kids or no-cook nights: If you skip the siracha or tone it down, kids actually love these too. You can set up a build-your-own cone bar with other fillings.
Picnic idea: Assemble them at the park! Just bring the ingredients separately and roll when you’re ready to eat.
— SAVE THIS POST —
Did you like this post? If you liked this post, don’t hesitate to share it!
Want to save this post? You can pin the following images on pinterest to save this post.
We are Mary and Eric, the founders of Be Right Back, a blog dedicated to romance around the globe and at home.
We are Mary and Eric, the founders of Be Right Back, a blog dedicated to romance around the globe and at home. With over 10 years of experience in dating and traveling to romantic places, we share our favorite date ideas and romantic destinations to help couples level up their relationships. Having lived in and traveled through the USA, we also share our favourite things to do in the States.
With 70,000 monthly readers and 16,000 followers on social media, Be Right Back is your go-to resource for romantic trip ideas and couple activities at home and abroad.